The Eraser Tool in Photoshop Elements – Instructions
The Eraser Tool in Photoshop Elements: Video
This video lesson, titled “Learn How to Use the Eraser Tool in Adobe Photoshop Elements 2023: A Training Tutorial,” shows you how to use the Eraser Tool in Photoshop Elements. This video is from our complete Photoshop Elements tutorial, titled “Mastering Photoshop Elements Made Easy v.2023.”
Overview of the Eraser Tool in Photoshop Elements:
The Eraser tool in Photoshop Elements applies the background color to an image. Contrary to what its name implies, this tool does not make pixels transparent in an image. Instead, it applies the background color, versus the foreground color. To use the Eraser Tool in Photoshop Elements, click the “Eraser Tool” button in the Toolbox and, if necessary, the Tool Options Bar. Then set the color to apply as the “Background” color in the Toolbox. Then ensure you select the correct layer to which to apply the selected color in the “Layers” panel.
In the Tool Options Bar, you can select an eraser shape to use from the “Brush Preset Picker” pop-up menu. To set the width of the eraser tip, use the “Size” slider. Then select either the “Brush,” “Pencil,” or “Block” setting for the eraser in the “Type” section of the Tool Options Bar. If you select “Brush” or “Pencil” for your “Type,” then use the “Opacity” slider to set the transparency level of the color to apply. To erase using the current settings, then click and drag in the photo to apply the current background color.
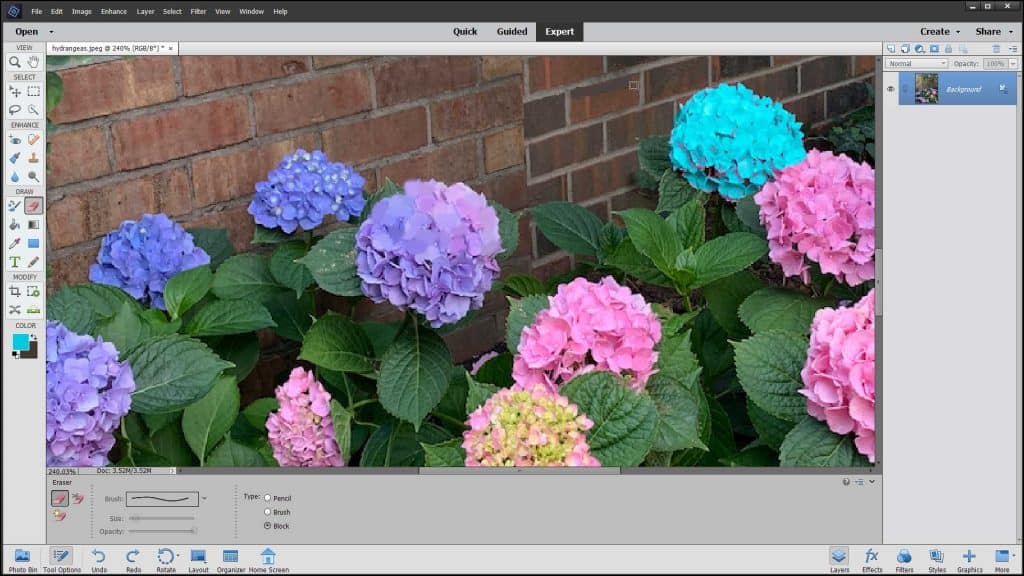
A picture of a user applying the background color by using the Eraser Tool in Photoshop Elements.
Instructions on How to Use the Eraser Tool in Photoshop Elements:
- To use the Eraser Tool in Photoshop Elements, select the “Eraser Tool” button in the Toolbox and, if necessary, the Tool Options Bar.
- Then set the color to apply as the “Background” color in the Toolbox.
- Then ensure you select the correct layer to which to apply the selected color in the “Layers” panel.
- Select an eraser shape to use from the “Brush Preset Picker” pop-up menu within the Tool Options Bar.
- To set the width of the eraser tip, use the “Size” slider.
- Then select either the “Brush,” “Pencil,” or “Block” setting for the eraser in the “Type” section of the Tool Options Bar.
- To set the transparency level of the color you are applying if you selected “Brush” or “Pencil” for your “Type,” then use the “Opacity” slider.
- To erase using the current settings, then click and drag in the photo to apply the current background color.

