How to Use the Geometry Panel in Camera Raw in Photoshop: Video
This video lesson, titled “Learn How to Use Geometry in Camera Raw in Adobe Photoshop: A Training Tutorial,” shows how to adjust perspective using the Geometry panel in Camera Raw in Photoshop. This video lesson is from our complete Photoshop tutorial, titled “Mastering Photoshop Made Easy.”
Overview:
The Geometry panel in Camera Raw in Photoshop lets you automatically or manually correct perspective flaws in a camera raw image. To show the Geometry panel in the Camera Raw dialog box in Photoshop, click the “Edit” button in the toolbar at the right side of the Camera Raw dialog box, if needed, to show the Edit panel. Then click the “Geometry” tab in the Edit panel that appears to the left of the toolbar to expand it, if needed.
As shown in the Geometry panel, ensure you apply any necessary adjustments for lens corrections in the Optics panel before applying adjustments using the Geometry panel for optimal results. After that has been done, if needed, then apply any perspective adjustments here.
How to Apply Automatic Adjustments in the Geometry Panel in Camera Raw in Photoshop:
To automatically adjust the perspective in a camera raw photo, click the desired adjustment type button for the “Upright” setting. Before applying upright adjustments, if you want to prevent these adjustments from creating blank wedges at the sides of the photo, check the “Constrain crop” checkbox in the Geometry panel.
To disable upright if an automatic adjustment you select warps the photo even more, click the “Off: Disable upright” button. To automatically apply balanced perspective corrections, click the “Auto: Apply balanced perspective corrections” button. Alternatively, to only adjust the level, which often fixes slightly crooked photos, click the “Level: Apply only level correction” button.
To instead apply both level and vertical perspective corrections, which both fixes crooked photos and photos taken from a low level that causes converging vertical lines, click the “Vertical: Apply level and vertical perspective corrections” button. Alternatively, to apply level, vertical, and horizontal perspective corrections, which fixes crooked photos and both converging vertical and horizontal lines, click the “Full: Apply level, horizontal, and vertical perspective corrections” button.
How to Manually Draw Guides to Correct Perspective in the Geometry Panel in Camera Raw in Photoshop:
Alternatively, to manually draw guides to fix perspective issues in a photo, click the “Guided: Draw two or more guides to customize perspective corrections” button. Then ensure the “Draw guides” button and the “Show guides” checkbox that appears below in the Geometry panel are activated and checked, respectively.
If desired, to show the Loupe tool while drawing your guides, check the “Loupe” checkbox. Then draw two or more horizontal and/or vertical lines in the preview image to show Photoshop where to make your desired vertical and horizontal perspective corrections. If needed, to clear the guides you have drawn, click the “Clear Guides” button that appears in the Geometry panel.
How to Manually Correct Perspective:
Alternatively, to make manual perspective corrections to a camera raw photo, click the “Manual Transformations” button to expand that section and show its sliders, if needed. Then use the sliders or enter values into their adjacent fields, to manually correct the photo’s perspective issues. To correct vertical tilt, click and drag the “Vertical” slider left or right. To correct horizontal tilt, click and drag the “Horizontal” slider left or right. If needed, to rotate the image to fix a crooked photo, click and drag the “Rotate” slider left or right.
To adjust the horizontal and vertical aspect ratio, click and drag the “Aspect” slider left or right. To change the scale of the photo, click and drag the “Scale” slider left or right. If needed, to change the horizontal offset of the image, click and drag the “Offset X” slider left or right. To change the vertical offset of the image, click and drag the “Offset Y” slider left or right.
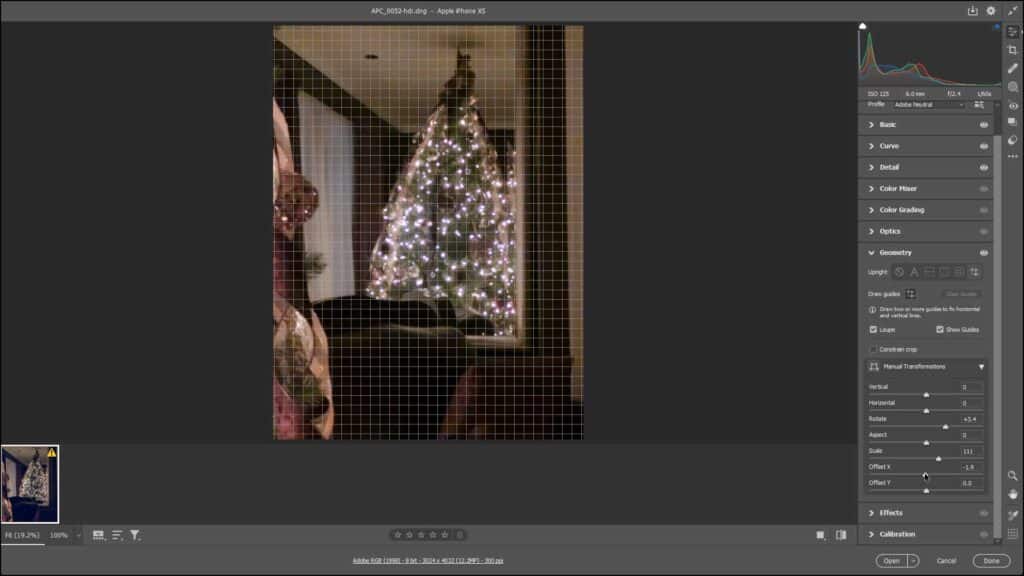
A picture of a user manually correcting perspective within the Geometry panel in Camera Raw in Photoshop.
How to Temporarily Hide Geometry Panel Adjustments:
To temporarily hide all Geometry panel adjustments in the preview image after changing these settings, click and hold down on the “eye” icon in the upper-right corner of the “Geometry” panel in the Edit panel. This temporarily hides the changes in the preview image while you hold down on this icon so you can see the changes in the preview image. Simply release the mouse button to restore the visibility of the changes.
Instructions on How to Use the Geometry Panel in Camera Raw in Photoshop:
- To show the Geometry panel in the Camera Raw dialog box in Photoshop, click the “Edit” button in the toolbar at the right side of the Camera Raw dialog box, if needed.
- Then click the “Geometry” tab in the Edit panel to the left of the toolbar to expand it, if needed.
- As shown in the Geometry panel, ensure you apply any necessary adjustments for lens corrections in the Optics tab before applying adjustments using the Geometry panel for optimal results. After that has been done, if needed, then apply any perspective adjustments here.
How to Apply Automatic Adjustments in the Geometry Panel in Camera Raw in Photoshop:
- To automatically adjust the perspective in a camera raw photo, click the desired adjustment type button for the “Upright” setting.
- Before applying upright adjustments, if you want to prevent these adjustments from creating blank wedges at the sides of the photo, check the “Constrain crop” checkbox in the Geometry panel.
- To disable upright, if needed, click the “Off: Disable upright” button.
- To automatically apply balanced perspective corrections, click the “Auto: Apply balanced perspective corrections” button.
- Alternatively, to only adjust the level, which often fixes slightly crooked photos, click the “Level: Apply only level correction” button.
- To instead apply both level and vertical perspective corrections, which both fixes crooked photos and photos taken from a low level that causes converging vertical lines, click the “Vertical: Apply level and vertical perspective corrections” button.
- Alternatively, to apply level, vertical, and horizontal perspective corrections, which fixes crooked photos and both converging vertical and horizontal lines, click the “Full: Apply level, horizontal, and vertical perspective corrections” button.
Instructions on How to Manually Draw Guides to Correct Perspective in the Geometry Panel in Camera Raw in Photoshop
- Alternatively, to manually draw guides to fix perspective issues in a photo, click the “Guided: Draw two or more guides to customize perspective corrections” button.
- Then ensure the “Draw guides” button and the “Show guides” checkbox that appears below in the Geometry panel are activated and checked, respectively.
- If desired, to show the Loupe tool while drawing your guides, check the “Loupe” checkbox.
- Then draw two or more horizontal and/or vertical lines in the preview image to show Photoshop where to make your desired vertical and horizontal perspective corrections.
- If needed, to clear the guides, click the “Clear Guides” button that appears in the Geometry panel.
How to Manually Correct Perspective:
- Alternatively, to make manual perspective corrections to a camera raw photo, click the “Manual Transformations” button to expand that section and show its sliders, if needed.
- Then use the sliders or enter values into their adjacent fields to correct the photo’s perspective issues.
- To correct vertical tilt, click and drag the “Vertical” slider left or right.
- To correct horizontal tilt, click and drag the “Horizontal” slider left or right.
- If needed, to rotate the image to fix a crooked photo, click and drag the “Rotate” slider left or right.
- To adjust the horizontal and vertical aspect ratio, click and drag the “Aspect” slider left or right.
- To change the scale of the photo, click and drag the “Scale” slider left or right.
- If needed, to change the horizontal offset of the image, click and drag the “Offset X” slider left or right.
- To change the vertical offset of the image, click and drag the “Offset Y” slider left or right.
Instructions on How to Temporarily Hide Geometry Adjustments:
- To temporarily hide all Geometry panel adjustments in the preview image after changing them, click and hold down on the “eye” icon in the upper-right corner of the “Geometry” panel in the Edit panel.
- To restore the visibility of the changes, then release the mouse button.