The Optics Panel in Camera Raw in Photoshop: Video Lesson
This video lesson, titled “Learn How to Use Optics in Camera Raw in Adobe Photoshop: A Training Tutorial,” shows how to apply a color using the Optics panel in Camera Raw in Photoshop. This video lesson is from our complete Photoshop tutorial, titled “Mastering Photoshop Made Easy.”
Overview:
The Optics panel in Camera Raw in Photoshop lets you correct image defects caused by lens distortions in a camera raw image. These tools let you easily correct image perspective flaws and chromatic aberrations from camera lenses that may appear in a camera raw image.
To show the Optics panel in Camera Raw in Photoshop, click the “Edit” button in the toolbar at the right side of the Camera Raw dialog box, if needed. Then click the “Optics” tab in the Edit panel that appears to the left of the toolbar to expand it, if needed. There are two tabs within the Optics tab you can use to correct lens flaws. These are the “Profile” tab and the “Manual” tab.
How to Automatically Correct Lens Distortions by Camera Model on the Profile Tab in the Optics Panel in Camera Raw in Photoshop:
To try to adjust a camera raw image to automatically fix lens distortions based on the camera model, click the “Profile” tab. To try to automatically correct chromatic aberration in the camera raw image, check the “Remove chromatic aberration” checkbox. A common type of chromatic aberration is caused by misaligned colors of light in a single spot in the image, often found on specular highlights, which makes a purple fringe around the specular highlights. Checking this checkbox reduces that in the image. Alternatively, you can also manually defringe chromatic aberration in the photo, if desired, as you’ll learn momentarily.
To try to automatically correct lens distortions for the camera raw image’s camera lens profile, check the “Use profile corrections” checkbox. If Photoshop can’t find a matching lens profile automatically, a warning message appears to tell you that. To select a new lens profile default or set a custom lens profile, if needed, click the arrow to the right of the “Use profile corrections” checkbox to expand it. If you click the “Setup” drop-down, you can select “Auto,” to automatically detect the photo’s lens, “Default” to use a saved default lens profile, or “Custom” to select a custom lens profile.
How to Create a Custom Lens Correction Profile:
To create a custom lens correction profile, which you can then save as a default, if desired, select the camera make from the “Make” drop-down. Then select the camera’s lens model from the “Model” drop-down for the make of camera you selected. To select a different profile for that model, if available, select it from the “Profile” drop-down. To save any manual distortion or vignette correction with the profile, use the “Distortion” and/or “Vignette” slider to set the desired values.
If desired, to save this camera lens profile as the new default, click the “Setup” drop-down and then select the “Save New Lens Profile Defaults” command. These saved settings then appear when you select the “Default” choice from the “Setup” drop-down in the future. To reset the default lens profile, if needed, click the “Setup” drop-down and select the “Reset Lens Profile Defaults” from the drop-down menu.
How to Manually Correct Vignetting and Lens Distortion on the Manual Tab in the Optics Panel in Camera Raw in Photoshop:
Alternatively, to manually correct for vignetting or distortion in a photo, click the “Manual” tab in the Optics tab. Then use the “Distortion” and/or “Vignette” slider to set the desired values. The “Distortion” slider corrects both barrel distortion, which causes straight lines to appear to bend outward, and pincushion distortion, which makes straight lines appear to bend inward. The “Vignette” slider corrects for vignetting, which makes the corners of an image appear darker than the center.
How to Manually Remove Chromatic Aberration Fringe:
To manually remove chromatic aberration fringe on either the “Profile” or “Manual” tab, click the arrow next to the “Defringe” section in the Optics tab to expand it. To defringe the photo by sampling the color in the chromatic aberration fringe, click the “Sample fringe” eyedropper tool button and then click into the fringe color to remove it.
Alternatively, to manually remove the fringe by color range, click and drag the two sliders under the “Purple Hue” and/or “Green Hue” sliders to set the color range of the fringe to remove. Then use the “Purple Amount” and/or “Green Amount” slider to set the amount of purple or green fringe to remove.
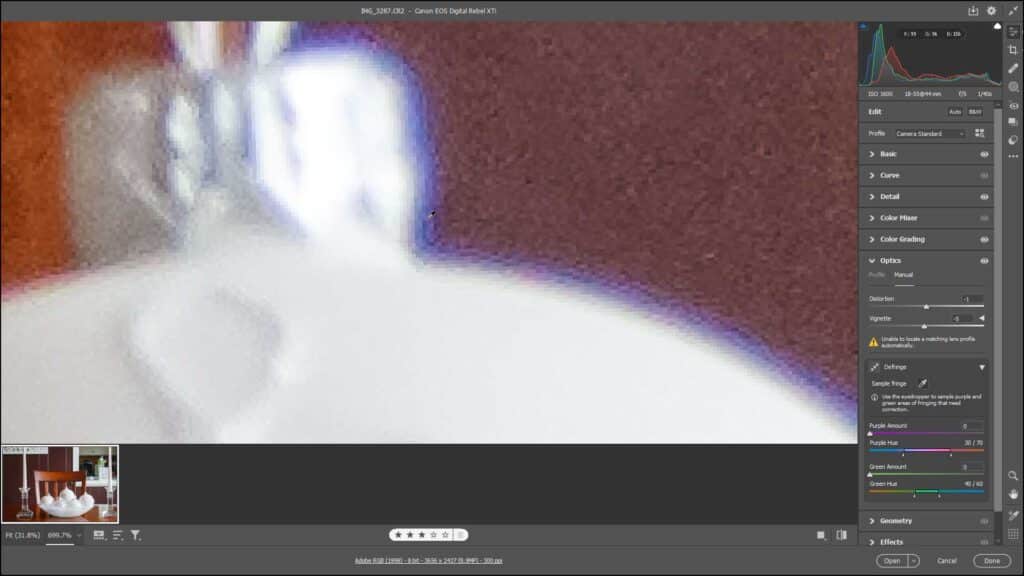
A picture of a user removing chromatic aberration fringe within the Optics panel in Camera Raw in Photoshop.
How to Temporarily Hide Optics Panel Adjustments:
To temporarily hide all Optics tab adjustments in the preview image after changing these settings, click and hold down on the “eye” icon in the upper-right corner of the “Optics” tab in the Edit panel. This temporarily hides the changes in the preview image while you hold down on this icon so you can see the changes in the preview image. Simply release the mouse button to restore the visibility of the changes.
Instructions on How to Use the Optics Panel in Camera Raw in Photoshop:
- To show the Optics panel in the Camera Raw dialog box in Photoshop, click the “Edit” button in the toolbar at the right side of the Camera Raw dialog box, if needed.
- Then click the “Optics” tab in the Edit panel that appears to the left of the toolbar to expand it, if needed.
- There are two tabs in the Optics tab to correct lens flaws: the “Profile” tab and the “Manual” tab.
How to Automatically Correct Lens Distortions by Camera Model on the Profile Tab in the Optics Panel in Camera Raw in Photoshop:
- To attempt to adjust a camera raw image to automatically fix lens distortions based on the camera model, click the “Profile” tab.
- If desired, to attempt to automatically correct chromatic aberration in the camera raw image, check the “Remove chromatic aberration” checkbox.
- To attempt to automatically correct lens distortions for the camera raw image’s camera lens profile, check the “Use profile corrections” checkbox. If Photoshop cannot locate a matching lens profile automatically, a warning message appears to tell you that fact.
- To specify a new lens profile default to use or to set a custom lens profile, if needed, click the arrow to the right of the “Use profile corrections” checkbox to expand it.
- If you click the “Setup” drop-down, you can select “Auto,” to automatically detect the photo’s lens, “Default” to use a saved default lens profile, or “Custom” to select a custom lens profile.
How to Create a Custom Lens Correction Profile:
- To create a custom lens correction profile, which you can then save as a default, if desired, select the camera make from the “Make” drop-down.
- Then select the camera’s lens model from the “Model” drop-down for the make of camera you selected.
- To select a different profile for that model, if available, select it from the “Profile” drop-down.
- To save any manual distortion or vignette correction with the profile, use the “Distortion” and/or “Vignette” slider to set the desired values.
- If desired, to save this camera lens profile as the new default, click the “Setup” drop-down and then select the “Save New Lens Profile Defaults” command. These saved settings then appear when you select the “Default” choice from the “Setup” drop-down in the future.
- To reset the default lens profile, if needed, click the “Setup” drop-down and select the “Reset Lens Profile Defaults” from the drop-down menu.
Instructions on How to Manually Correct Vignetting and Lens Distortion on the Manual Tab in the Optics Panel in Camera Raw in Photoshop
- Alternatively, to manually correct vignetting or distortion, click the “Manual” tab in the Optics tab.
- Then use the “Distortion” and/or “Vignette” slider to set the desired values.
- The “Distortion” slider corrects both barrel distortion, which causes straight lines to appear to bend outward, and pincushion distortion, which makes straight lines appear to bend inward.
- The “Vignette” slider corrects vignetting, which is when an image’s corners appear darker than the center.
How to Manually Remove Chromatic Aberration Fringe in the Optics Panel in Camera Raw in Photoshop:
- To manually remove chromatic aberration fringe on either the “Profile” or “Manual” tab, click the arrow next to the “Defringe” section in the Optics tab to expand it.
- To defringe the photo by sampling the color in the chromatic aberration fringe, click the “Sample fringe” eyedropper tool button and then click into the fringe color to remove it.
- Alternatively, to manually remove the fringe by color range, click and drag the two sliders under the “Purple Hue” and/or “Green Hue” sliders to set the color range of the fringe to remove.
- Then use the “Purple Amount” and/or “Green Amount” slider to set the amount of fringe to remove.
Instructions on How to Temporarily Hide Optics Adjustments:
- To temporarily hide all Optics tab adjustments in the preview image after changing them, click and hold down on the “eye” icon in the upper-right corner of the “Optics” tab in the Edit panel.
- To restore the visibility of the changes, then release the mouse button.