The Refine Selection Brush Tool in Photoshop Elements
The Refine Selection Brush Tool in Photoshop Elements: Video
This video lesson, titled “How to Use the Refine Selection Brush Tool in Adobe Photoshop Elements 2023: A Training Tutorial,” shows how to use the Refine Selection Brush Tool in Photoshop Elements. This video lesson is from our complete Photoshop Elements tutorial, titled “Mastering Photoshop Elements Made Easy v.2023.”
Overview of the Refine Selection Brush Tool in Photoshop Elements:
The Refine Selection Brush Tool in Photoshop Elements is a selection tool. It lets you add pixels to, or remove pixels from, an existing selection by automatically detecting images edges. You can also use the Refine Selection Brush Tool in Photoshop Elements to manually add pixels to, or remove pixels from, selections. In addition, you can also use the Refine Selection Brush Tool in Photoshop Elements to smooth jagged edges within existing pixel selections.
How to Use the Refine Selection Brush Tool:
To use the Refine Selection Brush Tool in Photoshop Elements, choose the Refine Selection Brush Tool from the Toolbox and, if necessary, the Tool Options Bar. In the Tool Options Bar, first select which mode this tool uses to adjust pixels in selections. Clicking the “Add to selection” or “Subtract from selection” buttons lets you manually add or remove pixels from existing selections. These modes let this tool act much like the “Selection Brush Tool” does. Alternatively, the “Push Selection” button lets you push an existing selection line. It then forces the line to snap to the first adjacent image edge it finds. Alternatively, the “Smooth selection” button lets you smooth jagged edges within existing selection lines.
After selecting the mode to use, set the pixel size of the tool by using the “Size” slider. Alternatively, enter a pixel value into the adjacent field. If using the “Push Selection” mode, use the “Snap Strength” slider to adjust the image edge snapping strength.
When you place this tool over the image, the tool’s mouse cursor appears as two concentric circles. The inner circle is the size of the actual pixel selection brush. The outer circle is the area surrounding the brush within which this tool looks for image edges. It can then snap the selection lines to the edges it finds.
How to Use Add to Selection or Subtract from Selection Mode:
How you use this tool also depends on the mode you selected. If using “Add to selection” mode, then either click and drag or click and hold down the mouse button. This manually adds the pixels underneath the inner circle to an existing selection or creates a new selection. It immediately adds pixels under the inner circle. Clicking and holding down the mouse button slowly adds pixels to the selection within the outer circle, too. It adds these pixels based on the edges found in the image.
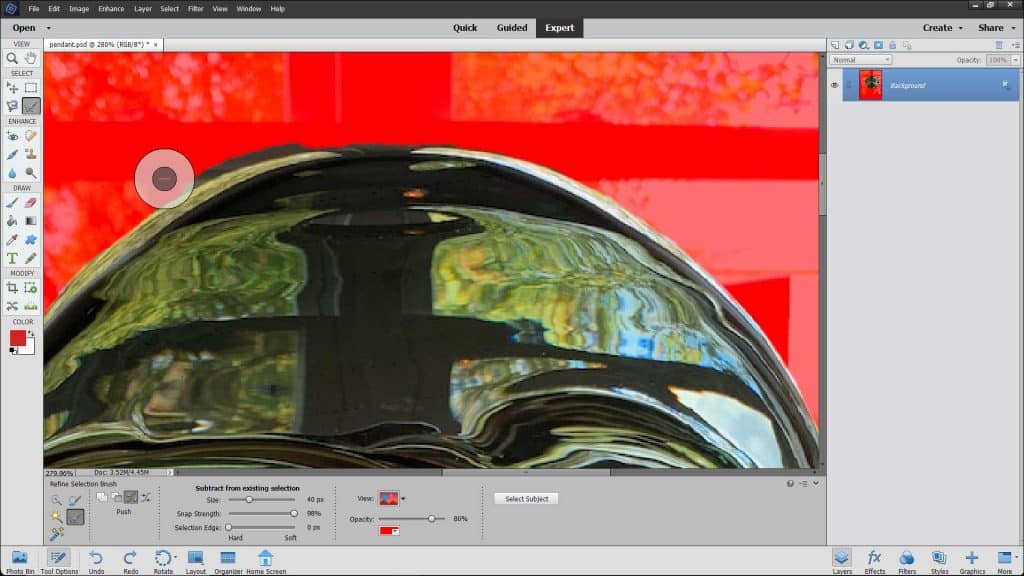
A picture showing how to use the Refine Selection Brush Tool in Photoshop Elements to add pixels to a selection.
Likewise, if using “Subtract from selection” mode, then either click and drag or click and hold down the mouse button. This manually removes the pixels underneath the inner circle from an existing selection. It immediately removes pixels under the inner circle. Clicking and holding down the mouse button slowly removes pixels from the selection in the outer circle, too. It does this based on the edges found in the image.
How to Use Push Selection Mode:
If you selected the “Push Selection” mode and wish to expand a selection, place the cursor inside the existing selection, so any selection line within the outer circle snaps outward to expand that selection edge to the next image edge found within the outer circle. To shrink a selection, place the cursor outside the selection, so any selection line within the outer circle snaps inward to contract that selection edge to the next image edge found in the outer circle.
How to Use Smooth Selection Mode:
If using “Smooth selection” mode, then click and drag the cursor or click and hold down the mouse pointer over the selection lines to which to apply smoothing in an existing selection.
Instructions on How to Use the Refine Selection Brush Tool in Photoshop Elements:
- To use the Refine Selection Brush Tool in Photoshop Elements, choose the Refine Selection Brush Tool from the Toolbox and, if necessary, the Tool Options Bar.
- To choose which mode to use to adjust pixels in selections, select either “Add to selection,” “Subtract from selection,” “Push Selection” or “Smooth selection” in the Tool Options Bar.
- Then set the pixel size of the tool by using the “Size” slider or by entering a pixel value into the adjacent field.
- If using the “Push Selection” mode, then also use the “Snap Strength” slider to adjust the image edge snapping strength.
- When you place this tool over the image, the tool’s mouse cursor appears as two concentric circles. The inner circle is the size of the actual pixel selection brush. The outer circle is the area surrounding the brush within which this tool looks for image edges to which it can snap the selection lines.
- To use “Add to selection” mode, then either click and drag or click and hold down the mouse button.
- This manually adds the pixels underneath the inner circle to an existing selection or creates a new selection.
- It immediately adds pixels under the inner circle.
- Clicking and holding down the mouse button slowly adds pixels to the selection within the outer circle, too. It adds these pixels based on the edges found in the image.
- Alternatively, to use “Subtract from selection” mode, then either click and drag or click and hold down the mouse button.
- This manually removes the pixels underneath the inner circle from an existing selection.
- It immediately removes pixels under the inner circle.
- Clicking and holding down the mouse button slowly removes pixels from the selection within the outer circle, too. It does this based on the edges found in the image.
- Alternatively, to use this tool in “Push Selection” mode to expand a selection, place the cursor inside the existing selection, so any selection line within the outer circle snaps outward to expand that selection edge to the next image edge found in the outer circle.
- Alternatively, to use this tool in “Push Selection” mode to shrink a selection, place the cursor outside of the selection, so any selection line within the outer circle snaps inward to contract that selection edge to the next image edge found in the outer circle.
- Alternatively, to use the “Smooth selection” mode, click and drag the cursor or click and hold down the mouse pointer over the selection lines to which to apply smoothing in an existing selection.

