The Stroke Command in Photoshop Elements- Instructions
How to Apply the Stroke Command in Photoshop Elements: Video
This video lesson, titled “Learn How to Apply a Stroke to Pixels in Adobe Photoshop Elements 2023: A Training Tutorial,” shows you how to apply the Stroke command in Photoshop Elements. This video lesson is from our complete Photoshop Elements tutorial, titled “Mastering Photoshop Elements Made Easy v.2023.”
Overview of How to Use the Stroke Command in Photoshop Elements:
The Stroke command in Photoshop Elements lets you paint a colored border around all pixel content within a selected raster layer or around a selection within a raster layer. However, you cannot stroke the entire “Background” layer in Photoshop Elements unless you first convert it to a normal raster layer, and you cannot stroke a blank raster layer unless you make a selection within it.
To perform the Stroke command in Photoshop Elements, first click to select the desired raster layer within which to apply a stoke in the Layers panel. If needed, then make a selection to stroke. Then select “Edit| Stroke (Outline) Selection…” from the Menu Bar to open the “Stroke” dialog box.
In the “Stroke” dialog box, then type a pixel width for the stroke into the “Width:” field. By default, Photoshop Elements wants to apply the current foreground color as the stroke color. To instead select the color of the stroke, click the “Color” sample to open the “Color Picker” dialog box, use the dialog box to select the desired stroke color, and then click the “OK” button to return to the “Stroke” dialog box.
Then select whether to add the stroke inside, centered, or outside the selection edge or pixel content in the selected layer by choosing the “Inside,” “Center” or “Outside” option button in the “Location” section. To set the color blending mode applied to the stroke, use the “Mode” drop-down. To set the opacity percentage of the stroke, type the desired percentage into the “Opacity” field. Finally, to apply the stroke, click the “OK” button to apply the stroke border to the selection or pixel content of the raster layer.
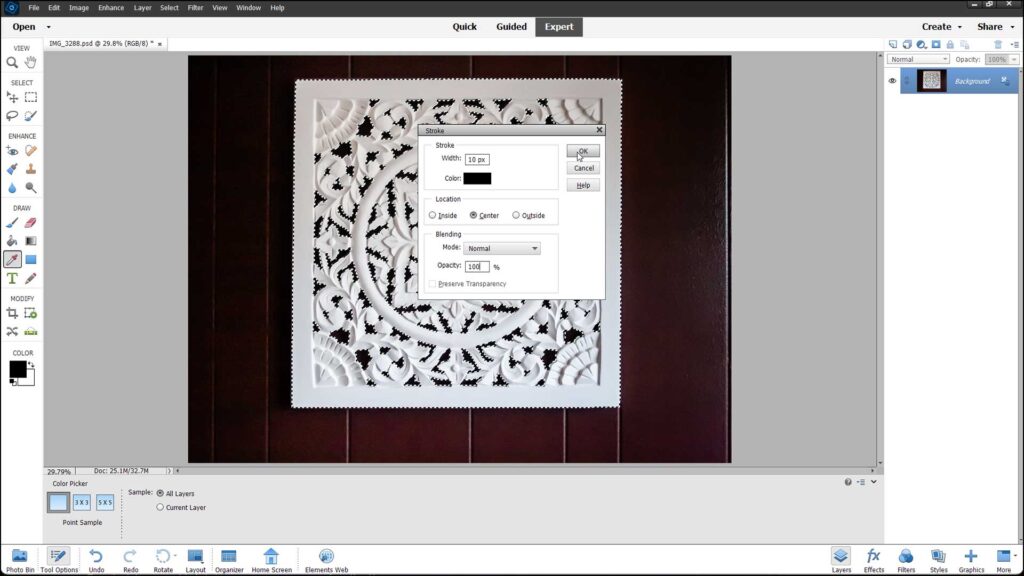
A picture of a user applying a stroke in the “Stroke” dialog box after opening the dialog box using the Stroke command in Photoshop Elements.
Instructions on How to Use the Stroke Command in Photoshop Elements:
- To apply the Stroke command in Photoshop Elements, first click to select the desired raster layer within which to apply a stoke in the Layers panel.
- If needed, then make a selection to stroke.
- Then select “Edit| Stroke (Outline) Selection…” from the Menu Bar to open the “Stroke” dialog box.
- In the “Stroke” dialog box, type a pixel width for the stroke into the “Width:” field.
- By default, Photoshop Elements wants to apply the current foreground color as the stroke color.
- To instead select the color of the stroke, click the “Color” sample to open the “Color Picker” dialog box, use the dialog box to select the desired stroke color, and then click the “OK” button to return to the “Stroke” dialog box.
- Then select whether to add the stroke inside, centered, or outside the selection edge or pixel content in the selected layer by choosing the “Inside,” “Center” or “Outside” option button in the “Location” section.
- To set the color blending mode applied to the stroke, use the “Mode” drop-down.
- To set the opacity percentage of the stroke, type the desired percentage into the “Opacity” field.
- Finally, to apply the stroke, click the “OK” button to apply the stroke border to the selection or pixel content of the raster layer.

