TeachUcomp, Inc.

 MY CART
  • VIDEO COURSES
    • All-Access Subscriptions
    • Business Licensing
    • Course List
      • Accounting
      • Adobe
        • Acrobat
        • Lightroom Classic
        • Photoshop
        • Photoshop Elements
      • Crystal Reports
      • Employment Skills
        • Interview Skills
        • Resume Skills
      • For Lawyers
        • Excel for Lawyers
        • Outlook for Lawyers
        • QuickBooks for Lawyers
        • Word for Lawyers
      • HTML
      • JavaScript
      • Microsoft Office
        • Access
        • Excel
        • Microsoft Office Suite
        • OneNote
        • Outlook
        • Outlook on the Web
        • PowerPoint
        • Publisher
        • Word
      • Microsoft Project
      • Microsoft Teams
      • QuickBooks Online
      • QuickBooks Pro
      • Sage
        • Peachtree
        • Sage 50
      • SQL
      • Windows
    • Video Course Options
  • SUBSCRIPTIONS
  • MANUALS
    • Adobe
      • Acrobat
      • Lightroom Classic
      • Photoshop
      • Photoshop Elements
    • Crystal Reports
    • For Lawyers
      • Excel for Lawyers
      • Outlook for Lawyers
      • QuickBooks for Lawyers
      • Word for Lawyers
    • HTML
    • JavaScript
    • Microsoft Office
      • Access
      • Excel
      • OneNote
      • Outlook
      • Outlook on the Web
      • PowerPoint
      • Publisher
      • Word
    • Microsoft Project
    • Microsoft Teams
    • QuickBooks Online
    • QuickBooks Pro
    • Sage
      • Peachtree
      • Sage 50
    • SQL
    • Windows
  • REFERENCE CARDS
    • Adobe
      • Acrobat
      • Lightroom Classic
      • Photoshop
      • Photoshop Elements 2023
      • Photoshop Elements 2022
      • Photoshop Elements 2021
      • Photoshop Elements 2020
      • Photoshop Elements 2019
      • Photoshop Elements 2018
      • Photoshop Elements 15
    • Google
      • Google Classroom for Teachers
      • Google Docs
      • Google Drive
      • Google Forms
      • Google Sheets
      • Google Slides
    • Mac OS
      • Mac OS Ventura-Mojave Keyboard Shortcuts
    • Microsoft Office
      • Excel Formulas and Functions
      • Excel Keyboard Shortcuts
      • Microsoft Office 365
        • Access for Office 365
        • Excel for Office 365
        • Microsoft Office 365
        • Outlook for Office 365
        • PowerPoint for Office 365
        • Publisher for Office 365
        • Word for Office 365
      • Microsoft Office 2021
        • Access 2021
        • Excel 2021
        • Microsoft Office 2021
        • Outlook 2021
        • PowerPoint 2021
        • Publisher 2021
        • Word 2021
      • Microsoft Office 2019
        • Access 2019
        • Excel 2019
        • Microsoft Office 2019
        • Outlook 2019
        • PowerPoint 2019
        • Publisher 2019
        • Word 2019
      • Microsoft Office 2016
        • Access 2016
        • Excel 2016
        • Microsoft Office 2016
        • OneNote 2016
        • Outlook 2016
        • PowerPoint 2016
        • Publisher 2016
        • Word 2016
      • Microsoft Office 2013
        • Excel 2013
        • Microsoft Office 2013
        • OneNote 2013
        • Outlook 2013
        • PowerPoint 2013
        • Word 2013
      • Microsoft Office for iPad
        • Microsoft Office for iPad
    • Microsoft Teams
      • Microsoft Teams
    • QuickBooks Online
      • QuickBooks Online
    • QuickBooks Pro
      • QuickBooks Pro 2023
      • QuickBooks Pro 2022
      • QuickBooks Pro 2021
      • QuickBooks Pro 2020
      • QuickBooks Pro 2019
      • QuickBooks Pro 2018
      • QuickBooks Pro 2017
      • QuickBooks Pro 2016
      • QuickBooks Pro 2015
      • QuickBooks Pro 2014
    • Sage
      • Sage 50 Accounting
    • SQL
      • SQL
    • Windows
      • Windows 11
      • Windows 11 and 10 Keyboard Shortcuts
      • Windows 10
  • STICKERS
    • Chrome OS
      • Chrome OS for Chromebooks
    • Mac OS
      • Mac OS Ventura
      • Mac OS Monterey-Mojave
    • Microsoft Office
      • Word and Excel (Mac) 2022
      • Word and Excel (PC/Windows) 2021-2016 and 365
    • QuickBooks Desktop
      • QuickBooks Desktop (PC/Windows) 2023
      • QuickBooks Desktop (PC/Windows) 2022-2015
    • Windows
      • Windows 11 and 10
  • SUPPORT
    • Company
      • About Us
      • Blog
      • Contact Us
      • Our History
      • Our Philosophy
        • Customer Service
        • Mission
      • Policies
      • Testimonials
    • Contact Us
    • FAQ
    • Help
    • Lost Password
    • Register a Product
  • LOGIN
    • Manage My Account
    • Member Login
    • My Courses
Shop Now

The Zoom Tool and Hand Tool in Camera Raw in Photoshop – Instructions

by Joseph Brownell / Wednesday, August 23 2023 / Published in Latest, Photoshop
A picture showing a user clicking and dragging to zoom with the Zoom Tool when using the Zoom Tool and Hand Tool in Camera Raw in Photoshop.

Overview:

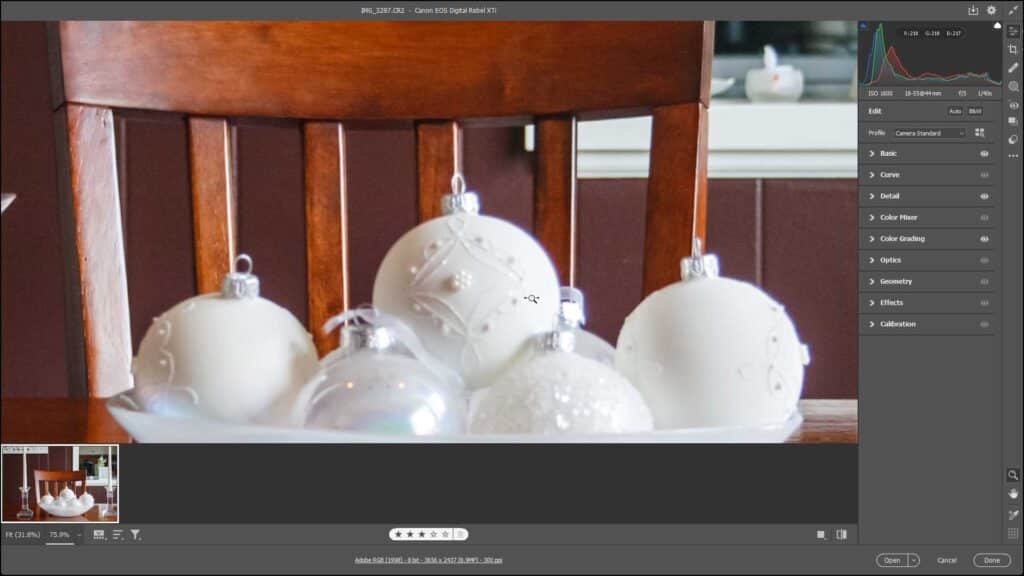
            This lesson shows you how to use the Zoom Tool and Hand Tool in the Camera Raw dialog box in Photoshop. The toolbar at the right side of the Camera Raw dialog box contains buttons for tools and buttons that change the panel to its left, where you can then access more tools and settings to edit the current camera raw image.

            You can click the “Edit” button in the toolbar, which is selected by default, to view its panel tabs to the left in the Edit panel. This is where you make most image adjustments to camera raw images in the Camera Raw dialog box. We’ll discuss the settings within each tab in this panel in detail in later lessons of this chapter.

How to Use the Zoom Tool in Camera Raw in Photoshop:

            After selecting the “Edit” button in the toolbar, then the default tool that appears when you hold your pointer over the preview image is the Zoom tool. To set the Zoom tool as the default tool to use in the Camera Raw dialog box if it is not selected, click the “Zoom tool” button in the toolbar at the right side of the Camera Raw dialog box.

            To zoom after selecting the Zoom tool, hold your pointer over the preview image and click to zoom in to the area at which you click. Then to  zoom out to fit the image in the preview area again, click again. To set the magnification level to use when you click the preview image to zoom in with the Zoom tool, select a choice from the “Select zoom level” drop-down.

            Alternatively, to set the magnification level by clicking and dragging with the Zoom tool, click and hold down with the Zoom tool in the preview image where you want to focus the magnification. To decrease the magnification level, then drag to the left and release when it is the desired magnification. Alternatively, to increase the magnification level, then drag to the right and release when it is the desired magnification.

A picture showing a user clicking and dragging to zoom with the Zoom Tool when using the Zoom Tool and Hand Tool in Camera Raw in Photoshop.

A picture showing a user clicking and dragging to zoom with the Zoom Tool when using the Zoom Tool and Hand Tool in Camera Raw in Photoshop.

            Alternatively, to zoom into a selection area you choose, hold down the “Ctrl” key on your keyboard. Then click and drag to create a selection in the preview image to magnify. Then release the mouse button to magnify and display the selected area within the camera raw dialog box. Finally, release the “Ctrl” key.

            To temporarily switch to the Hand Tool after selecting the Zoom tool, hold down the “Spacebar” key on your keyboard. To temporarily switch to the White Balance Tool, instead, hold down the “Shift” key.

How to Use the Hand Tool in Camera Raw in Photoshop:

            To use the Hand Tool by default in the Camera Raw dialog box in Photoshop, click the “Hand Tool” button at the bottom of the toolbar at the right side of the Camera Raw dialog box. The Hand Tool lets you scroll and pan the preview image in the window.

            Click and drag the preview image when using the Hand Tool in the Camera Raw dialog box to move it in the preview window. To temporarily switch to the Zoom tool after selecting the Hand Tool, hold down the “Ctrl” key or “Alt” key on your keyboard. To temporarily switch to the White Balance Tool, instead, hold down the “Shift” key.

Instructions:

How to Use the Zoom Tool in the Camera Raw Dialog Box in Photoshop:

  1. If you select the “Edit” button in the toolbar at the right side of the “Camera Raw” dialog box, then the default tool that appears when you hold your pointer over the preview image is the Zoom tool.
  2. To set the Zoom tool as the default tool to use in the “Camera Raw” dialog box if it is not selected, click the “Zoom tool” button in the toolbar at the right side of the “Camera Raw” dialog box.

To Zoom In and Zoom Out Using the Zoom Tool in the Camera Raw Dialog Box in Photoshop:

  1. To zoom after selecting the Zoom tool, hold your pointer over the preview image and click to zoom in to the area at which you click.
  2. Then, to zoom out to fit the image in the preview area again, click again.
  3. To set the magnification level to use when you click the preview image to zoom in with the Zoom tool, select a choice from the “Select zoom level” drop-down.
  4. Alternatively, to set the magnification level by clicking and dragging with the Zoom tool, click and hold down with the Zoom tool in the preview image where you want to focus the magnification.
  5. To decrease the magnification level, then drag to the left and release when it is the desired magnification.
  6. Alternatively, to increase the magnification level, then drag to the right and release when it is the desired magnification.
  7. Alternatively, to zoom into a selection area you choose, hold down the “Ctrl” key on your keyboard.
  8. Then click and drag to create a selection in the preview image to magnify.
  9. Then release the mouse button to magnify and display the selected area within the camera raw dialog box.
  10. Then release the “Ctrl” key.

To Temporarily Switch Tools After Selecting the Zoom Tool:

  1. To temporarily switch to the Hand Tool after selecting the Zoom tool, hold down the “Spacebar” key on your keyboard.
  2. Alternatively, to temporarily switch to the White Balance Tool, instead, hold down the “Shift” key.

How to Use the Hand Tool in the Camera Raw Dialog Box in Photoshop:

  1. To use the Hand Tool by default in the “Camera Raw” dialog box in Photoshop, click the “Hand Tool” button at the bottom of the toolbar at the right side of the “Camera Raw” dialog box.
  2. Then click and drag the preview image when using the Hand Tool in the “Camera Raw” dialog box to move the preview image within the preview window.

To Temporarily Switch Tools After Selecting the Hand Tool:

  1. To temporarily switch to the Zoom tool after selecting the Hand Tool, hold down the “Ctrl” key or “Alt” key on your keyboard.
  2. To temporarily switch to the White Balance Tool, instead, hold down the “Shift” key.

Video Lesson:

            The following video lesson, titled “Learn How to Use the Zoom Tool and Hand Tool in Camera Raw in Adobe Photoshop: A Training Tutorial,” shows how to open a camera raw image in Photoshop. This video lesson is from our complete Photoshop tutorial, titled “Mastering Photoshop Made Easy.”

Tagged under: camera raw file, camera raw files, camera raw image, camera raw images, camera raw in photoshop, course, hand tool, hand tool in camera raw, help, how to pan in camera raw in photoshop, how to use the hand tool in camera raw in photoshop, how to use the zoom tool in camera raw in photoshop, how to zoom using the zoom tool in camera raw in photoshop, how-to, instructions, learn, lesson, overview, photoshop, teach, training, tutorial, video, zoom out, zoom tool, zoom tool in camera raw

About Joseph Brownell

What you can read next

The Fv Function- Excel for Lawyers Tutorial: A picture of the Fv function being used in Excel.
The Fv Function- Excel for Lawyers Tutorial
Windows Keyboard Shortcuts Sticker
A picture that shows how to apply fills in Photoshop Elements by using the “Fill Layer” dialog box.
Apply Fills in Photoshop Elements – Instructions
Save $150! One Year Online Entire Library $49. Click here for more info.


Recent Posts

  • Add Space in HTML – Instructions

    Add Space in HTML: Overview             This tu...
  • The Optics Panel in Camera Raw in Photoshop – Instructions

    Overview:             The Optics panel in Camer...
  • The Color Grading Panel in Camera Raw in Photoshop – Instructions

    Overview:             The Color Grading panel i...

Categories

Archives

  • GET SOCIAL

© 2001-2023 Copyright TeachUcomp, Inc. All rights reserved.

TOP
Sale! 20% OFF Store-wide 0 Days 21 Hours 14 Minutes 47 Seconds      Use Coupon: AH20
Shop Now