Using Flash Fill in Microsoft Excel 2013

Click here for the complete Excel training
Starting in Excel 2013, you can use the “Flash Fill” feature to automatically fill-in values within a column with information entered into an adjacent column. This feature is most useful when dealing with data that has a consistent data entry pattern in the column whose values are referenced by the second, flash filled column. For example, if you had a column that contained the first and last names of employees, you could enter the last name of an employee into the adjacent column and then use flash fill to fill-in the corresponding values of all of the last names of the employees within the column. This can greatly reduce your dependence on text-parsing formulas within Excel. In this post, we will discuss how to flash fill a column in Microsoft Excel 2013.
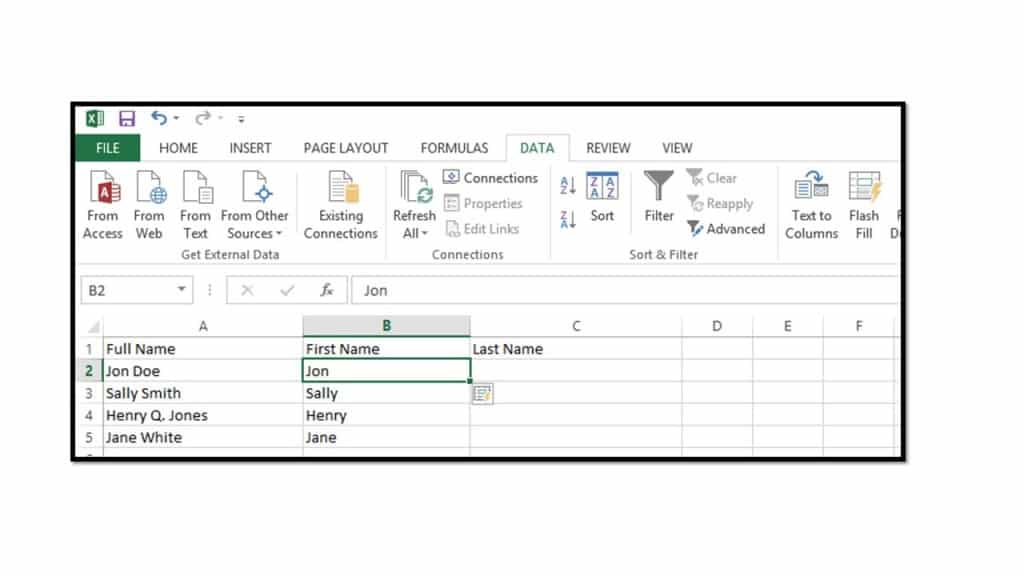
To flash fill a column of information click into a cell within a column that is next to, or contiguous to, the column that contains data you want to retrieve. Then enter the data value to extract from the adjacent cell into the cell within the column that you want to flash fill. Next, click into the next cell above or below the cell into which you entered the value, and then either press “Ctrl” + “E” on your keyboard or click the “Data” tab in the Ribbon and then click the “Flash Fill” button in the “Data Tools” button group.

Excel should then extract all of the corresponding data values from the adjacent column to fill-in the cells within the current column.
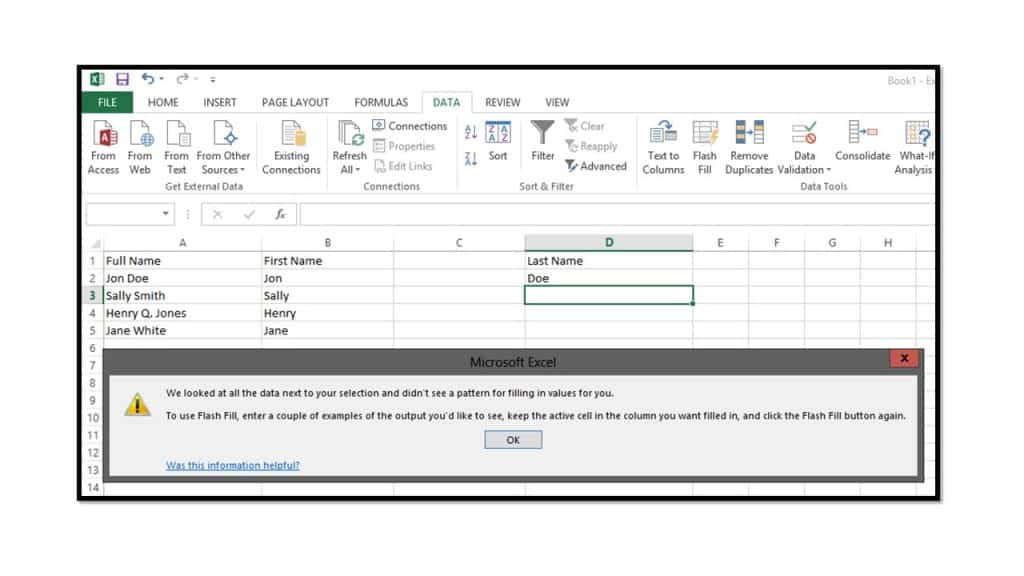
Note that when using the flash fill feature, the data column that is referenced can be non-adjacent as long as there is contiguous column data between the column that is flash filled and the referenced column. Basically, this means that you cannot have an empty or blank column between the column that is being flash filled and the column whose values are being referenced. In this case, Excel will display a message box that informs you that it cannot find a pattern in the adjacent data.
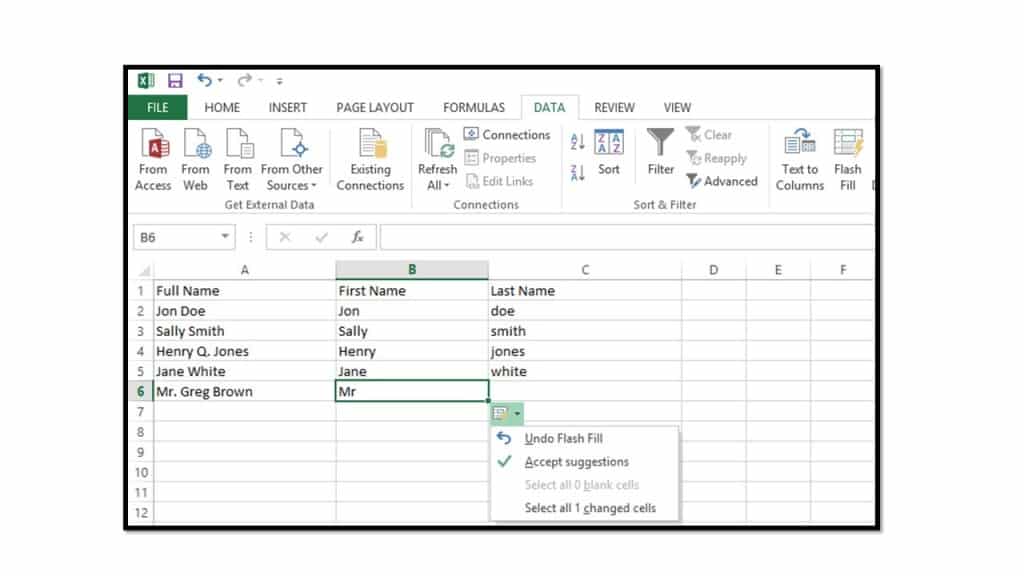
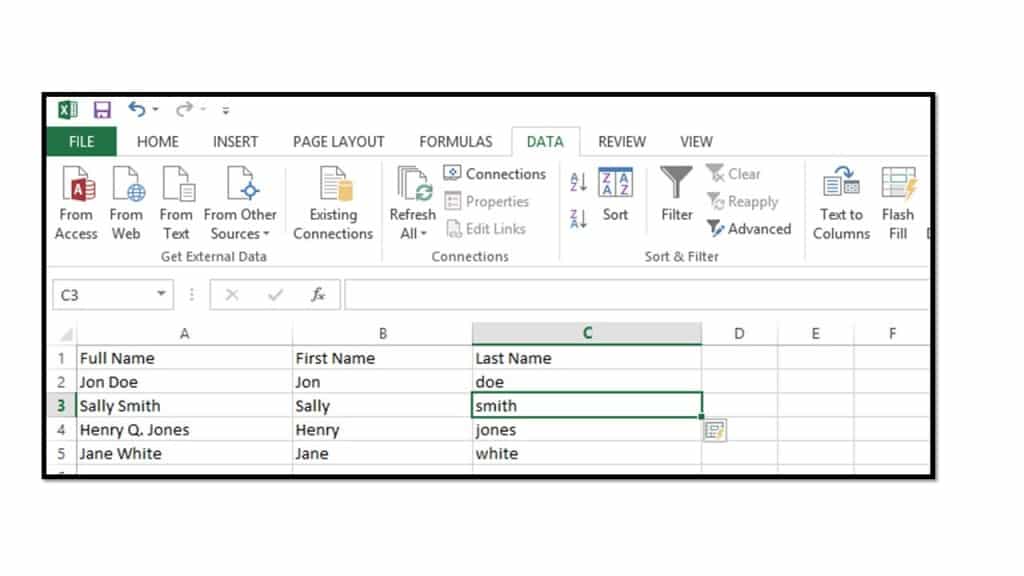
Another interesting point to note about using flash fill is that it references that casing of the entry that you make within the flash filled column and repeats your pattern when filling-in the remaining values. For example, if you had an adjacent cell with the value “Jon Doe” and then entered “doe” into the next column for the flash fill entry, all of the other flash-filled values would also use all lowercase last name entries. So it is worth noting that flash fill is case-sensitive and can be used to change casing of referenced values in the flash filled column.
Another point to note is that flash fill works best when referencing values that have a consistent pattern of data entry. For example, if you are referencing values within a column where some names have a prefix and some have a middle name and some have a suffix, flash fill may parse the incorrect information from the fields that it references when it fills-in the column’s values. So be sure to double-check the values that are returned by the flash fill feature. If this is the case, you can undo or delete the entries made by the flash fill feature and then try to use the traditional text-parsing functions within Excel to extract the needed values, instead.

Note that after you flash fill a column, a small icon appears next to the values that were entered. You can click the drop-down arrow on this icon to display a menu of choices. You can select the “Undo Flash Fill” command to undo an unsuccessful flash fill attempt. You can select the “Accept suggestions” command to accept the flash fill changes. You can select the “Select blank cells” and “Select changed cells” commands to select the blank cells or changed cells within the flash filled column.