Using Subfolders in Outlook for Lawyers- Instructions
Using Subfolders in Outlook for Lawyers: Video Lesson
This video lesson, titled “Using Subfolders,” discusses using subfolders in Outlook for lawyers. This video lesson is from our complete Outlook tutorial for lawyers, titled “Mastering Outlook Made Easy for Lawyers v.2019 and 365.”
Using Subfolders in Outlook for Lawyers: Overview
Using subfolders in Outlook for lawyers helps some attorneys organize email. Many attorneys find that they receive a substantial amount of daily email. One effective mail management technique that helps categorize, sort, and clear a cluttered mailbox is using subfolders in Outlook for lawyers. When using subfolders in Outlook for lawyers, you use subfolders to organize mail within an Inbox. While some feel that this is a deprecated technique that is not as efficient as using the newer Search folders within Outlook, it is still worth knowing how to perform.
Using subfolders in Outlook for lawyers allows them to create subfolders for their individual cases. They can then sort their incoming email into the desired folder manually or by using email rules. You can choose to create subfolders for clients, cases, projects or whatever convention makes the most sense for your particular organization. However you use this feature, you must know how to create a subfolder within your Inbox before you can use it.
One way to create a subfolder is to right-click the Inbox folder in the Folder Pane. Then select the “New Folder” command from the popup menu that appears. A new folder then appears in the Folder Pane beneath the Inbox. Type a name for the new folder and press the “Enter” key on your keyboard to create the new subfolder of the Inbox.
If you right-click the Inbox folder in the “Favorites” list, instead, and then select the “New Folder…” command from the pop-up menu, a “Create New Folder” dialog box opens. Enter the “Name” in the labeled field and choose what the “Folder contains:” from the dropdown list. Choose where to insert the folder in the “Select where to place the folder:” list. Then click “OK” to create your new subfolder.
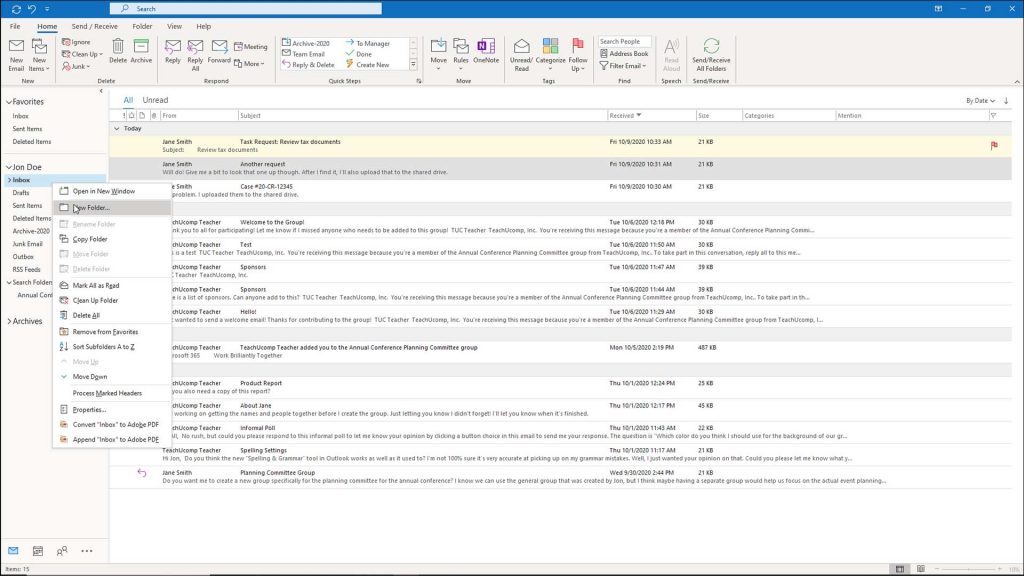
Using Subfolders in Outlook for Lawyers- Instructions: A picture showing how to create subfolders in Outlook.
If you make a mistake when naming the subfolder, you can rename it by right-clicking the desired subfolder and then selecting the “Rename Folder” command from the popup menu that appears. Then type the desired folder name and press the “Enter” key to set the name when finished. Also, note that you have a great deal of control over where you place your folders and what types of items they can contains by default.
When using subfolders in Outlook for lawyers, you can manually move any associated mail, appointments, tasks, or other Outlook items you receive into the designated subfolder when they arrive in your Inbox. To do this, select the Inbox within the Folder Pane to display the email within the Inbox. Then click and drag the email you want to move, and drop it onto the desired subfolder within the Folder Pane.
Using Subfolders in Outlook for Lawyers: Instructions
- To create a subfolder right-click the Inbox within the Folder Pane.
- Then select the “New Folder” command from the popup menu that appears.
- A new folder is then added to the Folder Pane beneath the Inbox.
- Type a name for the new folder and then press the “Enter” key on your keyboard to create the new subfolder.
- To create a subfolder from a folder in the “Favorites” list, right-click the Inbox under “Favorites” and select “New Folder” from the popup menu.
- The “Create New Folder” dialog box then opens.
- Enter the “Name:” for the folder in the labeled field.
- Choose what the “Folder contains:” from the dropdown list.
- Choose where to place the folder in the “Select where to place the folder:” list.
- Then click “OK” to create your new subfolder.
- To rename a subfolder, right-click the subfolder.
- Then select the “Rename Folder” command from the popup menu that appears.
- Type the desired folder name and press the “Enter” key to set the name.
- To manually move associated items to the newly created subfolder, select the Inbox within the Folder Pane to display the email within the Inbox.
- Click and drag the email you want to move and then drop it onto the desired subfolder within the Folder Pane.
