Using Tab Stops in Word- Instructions
Using Tab Stops in Word: Video Lesson
This video lesson, titled “Using Tab Stops,” shows different ways of using tabs stops in Word. This video is from our complete Word tutorial, titled “Mastering Word Made Easy v.2019 and 365.”
Using Tab Stops in Word: Overview
This tutorial is about creating and using tab stops in Word documents. Using tab stops in Word helps you create organized lists in Word documents. For example, suppose you had to create a document that lists the names of people in your company. Assume you also need to show within which department they work. In this case, it may be helpful to create a document that contains two columns of information. One column contains the names of the people and another column contains the names of the departments. Using tabs stops in Word lets you easily accomplish this type of task.
Many users often insert tabs into Word documents before writing the document’s text. However, you can also add them to existing paragraphs. Tabs can also change from paragraph to paragraph within a single document. Each paragraph, which may be no longer than a single line of text, can have its own unique set of tab stops. So, in summary, you do not need to place tabs in a strictly uniform way throughout a document.
How to Enable the Ruler to Add Tab Stops in Word
Before adding tab stops to a paragraph in a document, ensure the ruler is enabled. To enable the ruler when using the “Print Layout” view of a Word document, click the “View” tab in the Ribbon. Then check the “Ruler” checkbox in the “Show” button group. After the ruler is turned on, the tab stop toggle button appears to the far left of the horizontal ruler and above the vertical ruler in the corner of the screen. It is called a “toggle” button because when you click the button, you toggle between the various types of available tabs. The “Left,” “Center,” “Right,” “Decimal,” and “Bar” tabs are the types of available tabs.
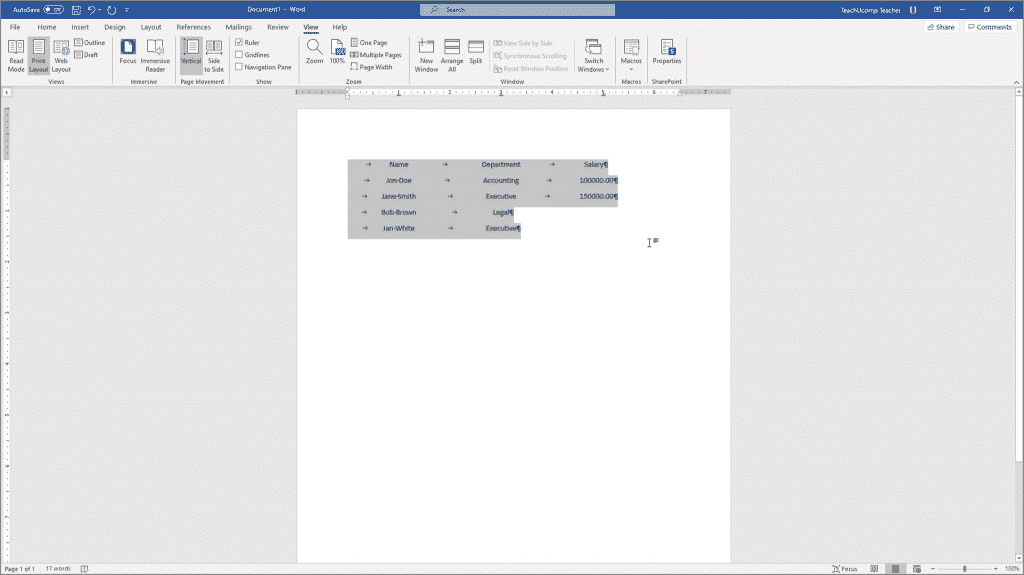
Using Tab Stops in Word- Instructions: A picture of a document showing the different types of tabs stops for selected paragraphs in Word within the horizontal ruler.
How to Add Tab Stops in Word
To insert a tab stop in Word, click into the paragraph where you will type the text. Alternatively, select existing lines of text to which to add tab stops. Then click the tab stop toggle button to the far left of the horizontal ruler and above the vertical ruler in the corner of the screen until its face displays the type of tab stop to insert.
To learn which tab stop type is currently selected, hold your mouse pointer over the tab stop toggle button. A screen tip then appears that shows the name of the tab stop type. If you click the button to change the tab stop type, then move your cursor away and back over the button again to show the name of the new tab stop type. Next, click into the horizontal ruler at the position at which to place a tab stop of the currently selected type.
The Different Types of Tab Stops in Word
The type of tab stop you insert affects the way text aligns when entering text after pressing the “Tab” key on the keyboard to arrive at the tab stop. Left tabs left-align adjacent text, right tabs right-align adjacent text, center tabs center-align adjacent text, and decimal tabs align numbers by their decimal points. The bar tab, often used in conjunction with the other tabs, draws a vertical bar wherever you place it within the ruler. It does not affect the alignment of text or act as a tab stop. It is purely for aesthetics.
How to Remove or Reposition a Tab Stop in Word
To remove a tab stop in Word, click into the paragraph to change. Alternatively, select the paragraphs with the same tabs stops to change. If the tabs stops appear grayed out or faded in the horizontal ruler, that means you have selected paragraphs with mis-matching tab stops and should reselect the text again to ensure you only select text with the same tabs stops.
Next, click and drag the tab stop to remove from the horizontal ruler and drop it into the document area. To reposition tab stops within the horizontal ruler, click and drag the small black tab stop icons in the ruler. Then release them in a new ruler location.
If you set tab stops for a paragraph, when you press the “Enter” key on your keyboard to create a new paragraph, the tab stops you created for the previous paragraph continue to the next paragraph. If you no longer want to have the same tabs stops, you must remove them from the new paragraph.
How to Use Tab Stops in Word
After adding tab stops to a new paragraph, press the “Tab” key on your keyboard to indent the line to the tab stop. Any text you then type aligns itself using the alignment of the tab stop type.
Using Tab Stops in Word: Instructions
Instructions on How to Enable the Ruler to Add Tab Stops in Word
- To enable the ruler when using the “Print Layout” view of a Word document before using tab stops in Word, click the “View” tab in the Ribbon.
- Then check the “Ruler” checkbox in the “Show” button group.
- After the ruler is turned on, you can see the tab stop toggle button appear to the far left of the horizontal ruler and above the vertical ruler in the corner of the screen.
Instructions on How to Add Tab Stops in Word
- To insert a tab stop in Word, enable the ruler, if needed.
- Then click into the paragraph within which to place the tab stop.
- Alternatively, select the paragraphs to which to add tab stops.
- Then click the tab stop toggle button to the far left of the horizontal ruler and above the vertical ruler in the corner of the screen until its face displays the tab stop type to insert.
- Then click at the position within the horizontal ruler at which to set the selected type of tab stop.
- Repeat steps 5 and 6 until you have placed all the desired tab stops for the selected paragraph(s) onto the horizontal ruler.
Instructions on How to Remove or Reposition a Tab Stop in Word
- To remove a tab stop from selected paragraphs in Word, click into the paragraph to change.
- Alternatively, select the paragraphs to change.
- If the tabs stops appear grayed out or faded in the horizontal ruler, that means you have selected paragraphs with mis-matching tab stops and should reselect the text again to ensure you only select text with the same tabs stops
- After the tab stops appear in black in the horizontal ruler, then click and drag one of the small, black tab stop icons to delete from the horizontal ruler and release it over the document area.
- To reposition an existing tab stop in the horizontal ruler, click and drag the tab stop icon to the left or right within the horizontal ruler and release it in its new location.
Instructions on How to Use Tab Stops in Word
- To use the tab stops you created in Word, press the “Tab” key on your keyboard to indent the line to the tab stop you inserted.
- Any text you then type aligns itself to the tab stop using the alignment of the associated tab stop type.

