Zip a Folder in Windows 11 – Instructions
How to Zip a Folder in Windows 11: Video
This video lesson, titled “Zip Folders in File Explorer,” shows how to zip a folder in Windows 11. This video lesson is from our complete Windows 11 tutorial, titled “Mastering Windows Made Easy v.11.”
Overview of How to Zip a Folder in Windows 11:
You can zip a folder in Windows 11 within a File Explorer window to compress its contents into a single zipped file you can send to others or just compress for storage. To open the contents of a zipped file, the recipient must unzip the file to uncompress the zipped folder and its contents. Windows 11 lets you zip and unzip files and folders shown within the File Explorer window.
To zip a file or folder using File Explorer in Windows 11, select the file or folder to zip in the File Explorer window. Then click the “See more” button in the Ribbon at the top of the File Explorer window. Then select the “Compress to ZIP file” command in the drop-down menu that appears.
Windows then automatically zips the selected file or folder and creates it within the same folder in the File Explorer window. Type a name for the zipped file, if needed, and then press the “Enter” key on your keyboard or click away from the zipped file in the window to set its name. Note that the zipped file defaults to having the same name as the selected file or folder, but with a “.zip” file extension.
Alternatively, to zip a file or folder using File Explorer in Windows 11, right-click the file or folder to zip in the right pane of the File Explorer window. Then select the “Compress to ZIP file” command in the pop-up contextual menu that appears.
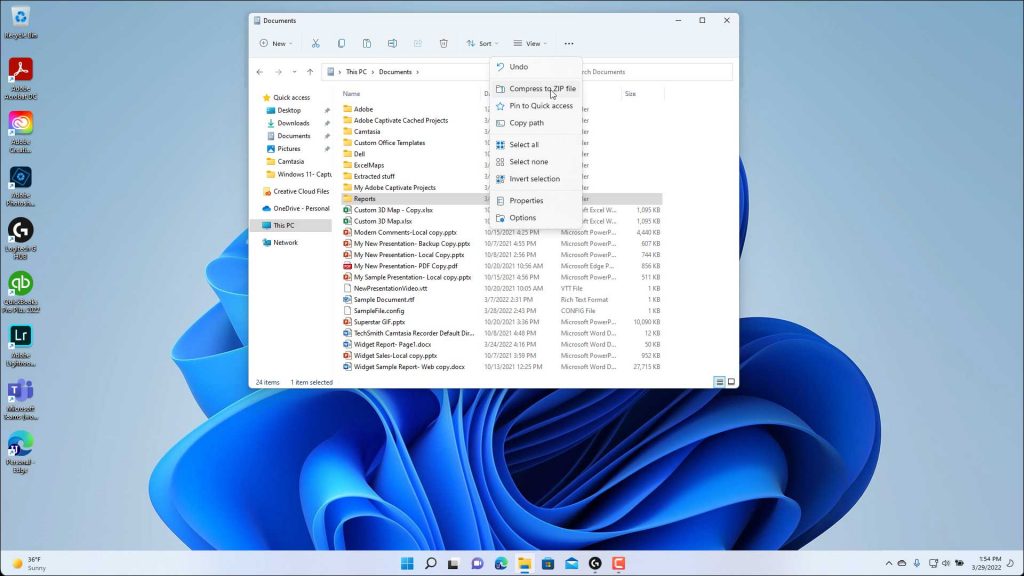
A picture showing how to zip a folder in Windows 11.
Instructions on How to Zip a Folder in Windows 11:
- To zip a file or folder using File Explorer in Windows 11, select the file or folder to zip in the File Explorer window.
- Then click the “See more” button in the Ribbon at the top of the File Explorer window.
- Then select the “Compress to ZIP file” command in the drop-down menu that appears.
- Windows then automatically zips the selected file or folder and creates it within the same folder in the File Explorer window.
- Type a name for the zipped file, if needed, and then press the “Enter” key on your keyboard or click away from the zipped file in the window to set its name.
- Note that the zipped file defaults to having the same name as the selected file or folder, but with a “.zip” file extension.
- Alternatively, to zip a file or folder using File Explorer in Windows 11, right-click the file or folder to zip in the right pane of the File Explorer window.
- Then select the “Compress to ZIP file” command in the pop-up contextual menu that appears.