How to Enter Early Bill Payment Discounts in QuickBooks Online
How to Enter Early Bill Payment Discounts in QuickBooks Online: Video
This video lesson, titled “How to Enter Early Bill Payment Discounts in QuickBooks Online,” shows you how to create vendor discounts before paying bills from vendors who provide early bill payment discounts in QuickBooks Online. This video lesson is from our complete QuickBooks Online tutorial, titled “Mastering QuickBooks Online Made Easy.”
Overview:
Create a Vendor Credit for the Early Bill Payment Discount:
If paying a bill that offers an early bill payment discount in QuickBooks Online, you must create the discount before paying the bill. To do this, create a “Vendor Credit” and apply it to the bill. To create a vendor credit, hover over the “+ Create” button in the Navigation Bar. Then click the “Vendor credit” link under the “Vendors” heading in the drop-down menu to open the “Vendor Credit” window.
Select the name of the vendor from the “Vendor” drop-down. The vendor’s mailing address should appear in the “Mailing address” field. Enter the date of the vendor credit into the “Payment date” field. Fill out the remaining fields in the upper portion of the vendor credit, as needed.
Make Sure to Correctly Account for the Vendor Discount:
To enter an early bill payment discount for amounts unrelated to items in your “Products and services” list, select the original expense account associated with the bill from the “Category” column within the “Category details” split-line list. This ensures the credit is applied to the correct account. In the “Description” column, enter a description for the vendor credit, like “2% discount if paid in 10 days.” In the “Amount” column, enter the amount of the early bill payment discount.
Alternatively, to enter an early bill payment discount for purchased items from your “Products and services” list, select the items in the “Item details” section and enter the discount amount for each item in the “Amount” column to ensure proper accounting, especially if recording early bill payment discounts for inventory items.
After entering the vendor discount information, then choose one of the “Save” options from the drop-down button in the lower-right corner of the window to save the credit and close the window.
Apply the Vendor Credit to the Associated Bill in the Pay Bills Window:
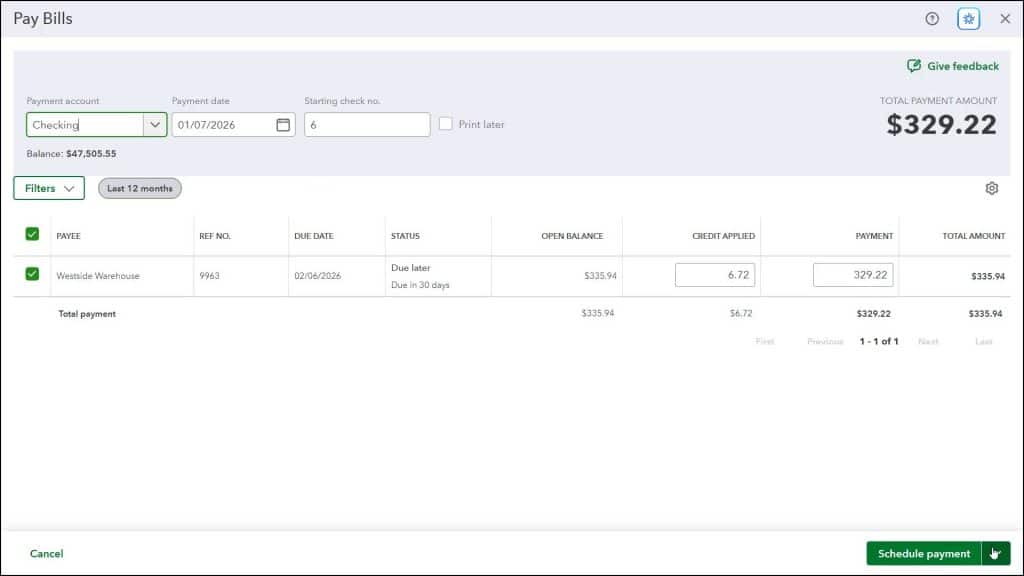
To apply the vendor credit to your bill, hover over the “+ Create” button again and then click the “Pay bills” link under the “Vendors” heading in the drop-down menu to open the “Pay Bills” window. Check the checkbox to the left of the vendor’s bill to which to apply the credit and pay the bill. The vendor credit should automatically be applied. The credit amount should appear in the “Credit Applied” column. The “Payment” column shows how much is paid from the account selected from the “Payment account” drop-down at the top of the window.
Then click or select a choice from the drop-down button in the toolbar in the lower-right corner of the window to either save the bill payment and select a follow-up action or schedule an online payment.