 MY CART
How to Change your PIN in Windows 11: Video Lesson
This video lesson, titled “How to Change Your PIN in Windows 11: A Training Tutorial,” shows you how to change your PIN in Windows 11. This video lesson is from our complete Windows tutorial, titled “Mastering Windows Online Made Easy.”
Overview:
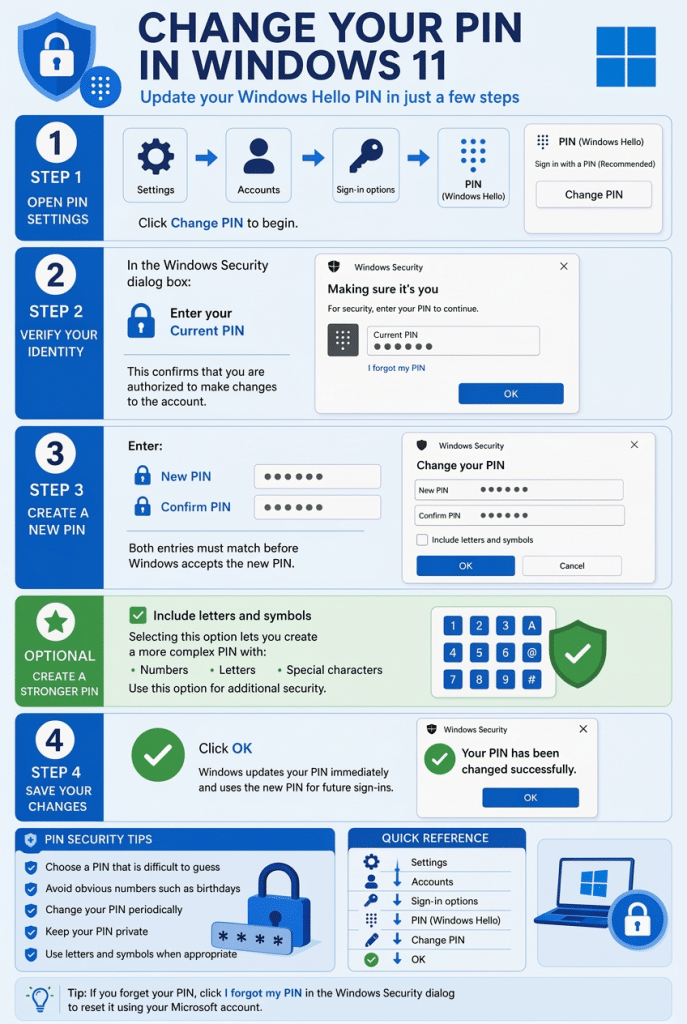
After creating a PIN, you may want to change it in Windows 11. For example, you might update your PIN periodically for security reasons or change it to something easier to remember. Windows makes it easy to update your PIN at any time through the Settings app.
How to Change Your PIN in Windows 11:
To change your PIN, open the Settings app by either clicking its icon in the Start menu or by right-clicking the Start button and then clicking the “Settings” command in the menu that appears. In the Settings app window, click “Accounts” at the left side of the window to display the account settings. Then click “Sign-in options” in the list of settings to show the available sign-in methods for your account.
Under the “Ways to sign in” section, click “PIN (Windows Hello)” to expand its settings. When this section expands, you will see available management options for your PIN. Click the “Change PIN” button to open a “Windows Security” dialog box where you can enter your new PIN.
Within the dialog box, enter your current PIN into the “PIN” field to verify your identity. Then enter your new PIN into both the “New PIN” and “Confirm PIN” fields to ensure accuracy. If desired, select the “Include letters and symbols” checkbox before entering your new PIN to create a more complex PIN that includes additional characters.
After entering the required information, click the “OK” button to confirm the change. Windows will then update your PIN and use it for future sign-ins. The next time you sign in to your device, you will need to use the new PIN you created.