Assign Account Numbers in QuickBooks Online- Instructions
Assign Account Numbers in QuickBooks Online: Video Lesson
This video lesson, titled “How to Assign Account Numbers in QuickBooks Online,” shows how to assign account numbers in QuickBooks Online. This video lesson is from our QuickBooks Online tutorial, titled “Mastering QuickBooks Online Made Easy.”
Overview:
How to Enable Account Numbers in QuickBooks Online:
To enable account numbers in QuickBooks Online, first click the “Settings” button. Then click the “Account and settings” link under the “Your Company” heading in the drop-down menu to open the “Account and Settings” window. Then click the “Advanced” link at the left side of the “Account and Settings” window. Finally, click the “Chart of Accounts” section that appears to the right to edit its settings.
Next, to enable account numbering, click the “Enable account numbers” toggle switch to set it to the “On” position. To show the account numbers in transaction forms and reports, check the “Show account numbers” checkbox. Then click the “Save” button at the bottom of this section to save your changes. Then click the “Done” button in the lower-right corner of the window to close it.
How to Assign Account Numbers in QuickBooks Online:
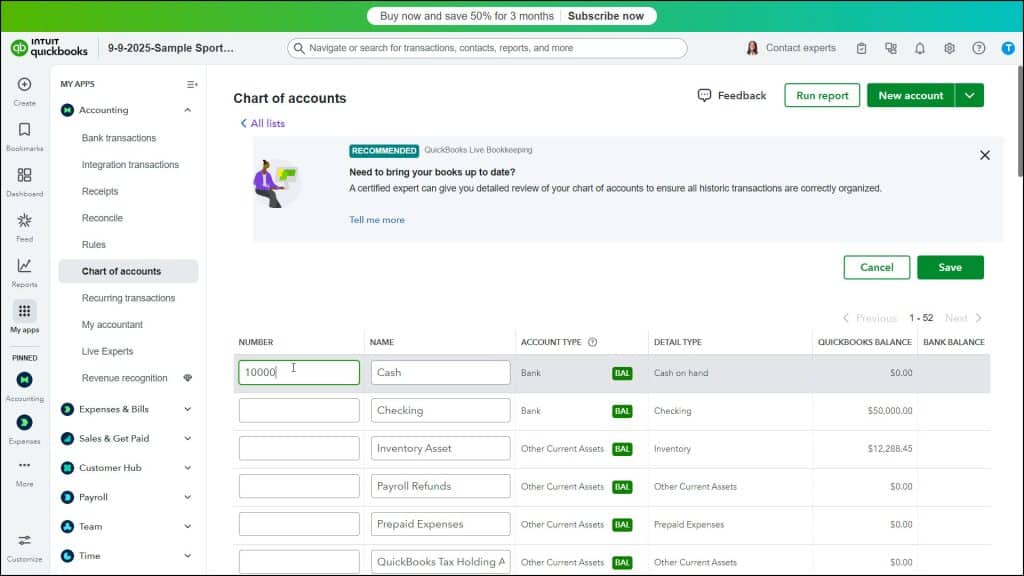
To assign account numbers in QuickBooks Online after enabling them in the company file, click the “Settings” button and click the “Chart of accounts” link under the “Your Company” heading in the drop-down menu to open the “Chart of Accounts” page. Then click the “Batch edit” button, which looks like a “pencil” icon, towards the upper-right corner of the “Chart of accounts” list to open a new page that lets you edit the account names and numbers.
Enter or edit the account numbers for your accounts in this page by typing them into the “Number” column that appears. Account numbers in QuickBooks Online Plus can only be up to twenty (20) digits long. If you type a number longer than this and try to save it, QuickBooks Online will tell you that an unexpected error has occurred. You will need to then reduce the length of the account number to 20 digits or fewer to save it.
If desired, you can also edit the account names by changing the values in the “Name” column in this page. To save your changes and close the page after you finish batch editing the records, click the “Save” button in the upper-right corner of the page.