Change an Employee’s Payroll Status in QuickBooks Online
How to Change an Employee’s Payroll Status in QuickBooks Online: Video
This video lesson, titled “How to Change an Employee’s Payroll Status in QuickBooks Online,” shows you how to change an employee’s employment status in QuickBooks Online if you subscribe to a QuickBooks Online Payroll service. This video lesson is from our complete QuickBooks Online tutorial, titled “Mastering QuickBooks Online Made Easy.”
Overview:
To record terminated employees or otherwise change an employee’s payroll status in QuickBooks Online if you subscribe to a QuickBooks Online Payroll service, click the “Employees” link under the “Payroll” app in the “All apps” bar to open the “Employees” page. For terminated employees, first make sure you have issued the employee their final paycheck.
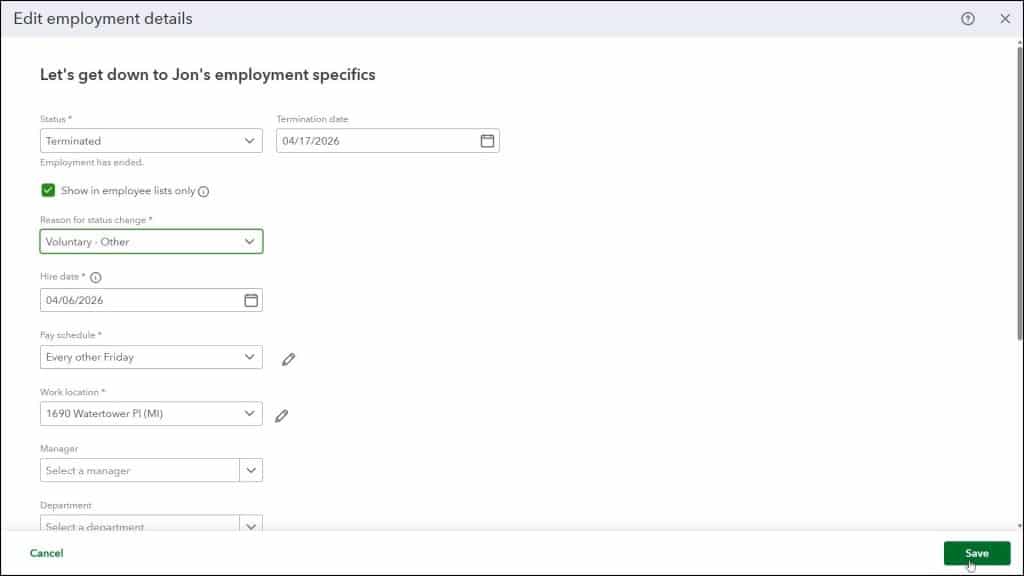
In the “Employees” page, click the name of the employee whose payroll status you want to change to open their employee details page. Then click the “Edit” link in the upper-right corner of the “Employment details” section in the employee details page to open the “Employment details” window.
Click the “Status” drop-down and select the desired payroll status choice. Choices include “Active,” “Terminated,” “Paid Leave of Absence,” “Unpaid Leave of Absence,” “Deceased,” and “Not on Payroll,” which is used for layoffs or furloughs. If you select the “Terminated,” “Unpaid Leave of Absence,” “Not on Payroll,” or “Deceased” choice and want to continue showing the employee in non-payroll lists, check the “Show in employee lists only” checkbox that then appears.
If you select the “Terminated” choice, then enter their date of termination into the “Termination date” field that then also appears. Then select the reason they were terminated from the “Reason for status change” drop-down that appears. Then click the “Save” button in the lower-right corner of this window to save the changes and close it.
To adjust how the employee list appears in the “Employees” page, click the drop-down towards the left side of the list to choose either the “Active employees,” “Inactive employees” or “All employees” option. QuickBooks Online Plus saves terminated employee data for a full year to ensure tax submissions and reports are accurate.


