Custom Sales Tax Rates in QuickBooks Online
How to Add, Edit, and Inactivate Custom Sales Tax Rates in QuickBooks Online: Video Lesson
This video lesson, titled “How to Add, Edit, and Inactivate Custom Sales Tax Rates in QuickBooks Online,” shows you how to create custom sales tax rates in QuickBooks Online. This video lesson is from our complete QuickBooks Online tutorial, titled “Mastering QuickBooks Online Made Easy.”
Custom Sales Tax Rates in QuickBooks Online: Overview
The “Custom rates” section in the “Sales tax settings” page in QuickBooks Online lets you create, edit, and inactivate custom sales tax rates you can collect on behalf of your sales tax agencies in your sales forms if you don’t use location-based customer sales tax calculations and want to manually track sales tax. To add, edit, or inactivate custom sales tax rates in QuickBooks Online, open the “Sales tax settings” page by clicking the “Sales tax settings” link under the “Sales Tax” app in the “All apps” bar.
How to Create a New Custom Sales Tax Rate:
To add a new custom sales tax rate, click the drop-down on the “Add agency” button towards the upper-right corner of the page and then click the “Add custom rate” command that appears to open an “Add a custom sales tax rate” pane at the right side of the window.
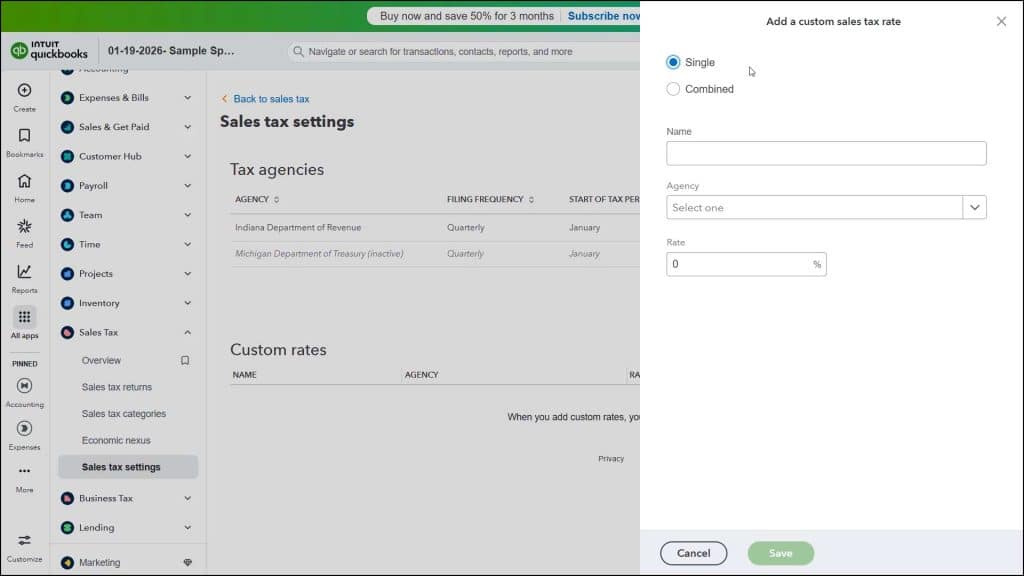
In this pane, select the option button for the type of custom sales tax rate to create. The first option is to create a “Single” sales tax rate and the second is to create a “Combined” sales tax rate. A single sales tax rate is a single tax rate collected for a single tax agency. A combined sales tax rate lets you create a single sales tax rate that collects multiple other sales tax rates for multiple sales tax agencies.
To show an example of a combined sales tax rate if you select the “Combined” option, then click the “Show example” link that appears. You use a combined sales tax rate to show a single sales tax rate in customer sales forms for which you must also individually collect and/or report each sales tax within that sales tax rate for the sales tax agencies.
Next, for either selection, enter the name of the sales tax rate to show in sales forms into the “Name” field. You then enter either a single rate or multiple rates, based on whether you are creating a “Single” or “Combined” tax rate. For each rate, select the name of the tax agency for whom you collect the sales tax from the “Agency” drop-down.
Then enter the rate you collect on behalf of that selected agency into the “Rate” field. For a “Combined” sales tax rate, also enter a nickname for the individual rate to help you clarify it in your own reports but note it will not appear in sales forms. When finished, click the “Save” button to save the new tax rate and close the pane. To cancel it, instead, click the “Cancel” button.
How to Edit a Custom Sales Tax Rate:
To edit an existing custom sales tax rate, click the “Edit” link under the “Action” column for the sales tax rate to edit in the “Custom rates” section of this page to open its details in a pane at the right side of the screen. Change it, as needed, and then click the “Continue” button at the bottom of the pane to compare your tax rate changes in the pane. To finish changing the rate, click the “Edit” button.
How to Inactivate or Delete a Custom Sales Tax Rate:
Alternatively, to make the custom tax rate inactive, which deletes the rate, click the drop-down in the “Action” column of the “Custom rates” section of the “Sales tax settings” page for the custom tax rate to inactivate and then select the “Make inactive” command from the drop-down menu.


