How to Adjust Inventory in QuickBooks Online
How to Adjust Inventory in QuickBooks Online: Video Lesson
This video lesson, titled “How to Adjust Inventory in QuickBooks Online,” shows you how to adjust inventory in QuickBooks Online. This video lesson is from our complete QuickBooks Online tutorial, titled “Mastering QuickBooks Online Made Easy.”
Overview:
How to Create an Inventory Adjustment:
If tracking inventory, you can adjust inventory in QuickBooks Online to either manually adjust the quantity on hand or adjust the inventory starting values. Adjusting the quantity on hand is helpful if there is spoilage, damage, or any event that changes the inventory amount, outside of regular purchases and sales. Alternatively, adjusting the inventory starting values helps to correct inventory costing errors.
To create an inventory adjustment for an inventory item in QuickBooks Online, click the “Settings” button in the QuickBooks Online toolbar. Then click the “Products and services” link under the “Lists” heading in the drop-down menu to open the “Products & services” page.
How to Adjust the Quantity on Hand:
To edit the inventory item for which to adjust the quantity on hand, click its “Edit” link under its “Action” column in the “Products & services” page to open its product/service information pane. The “Inventory info” section of this pane shows the item’s current quantity on hand to the far-right of the “Quantity on hand” label. Next to the “Quantity on hand” label is an “Adjust” label with a “Quantity” and a “Starting value” link. To adjust the quantity on hand, click the “Quantity” link to open an “Inventory quantity adjustment” window.
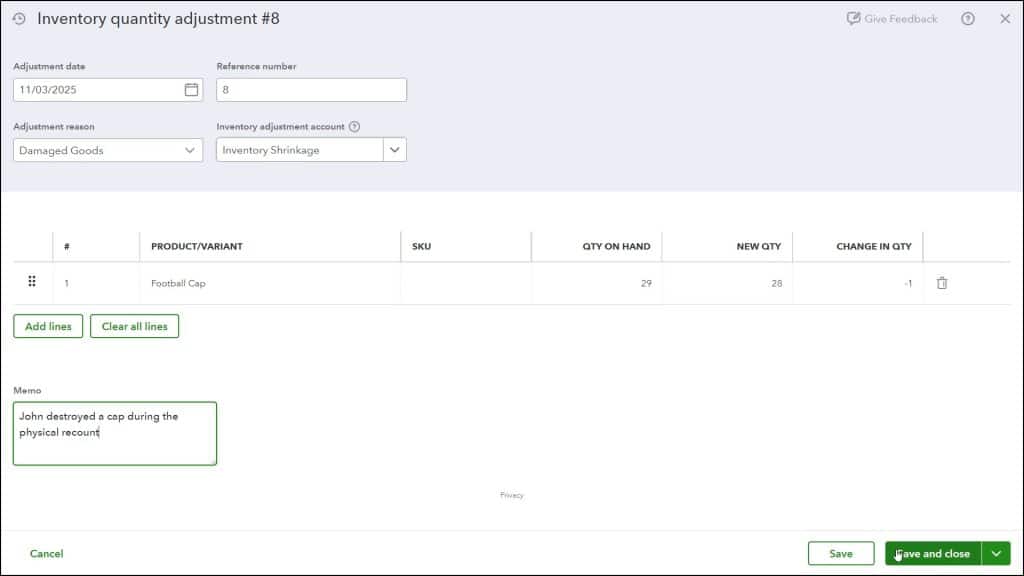
In this window, enter the date of the adjustment into the “Adjustment date” field. The “Reference number” field should automatically increment itself up to the next available integer. However, you can also manually enter a value into the field, if required. Select the reason for the inventory quantity adjustment from the “Adjustment reason” drop-down. If needed, use the “Inventory adjustment account” drop-down to select the correct account affected by the inventory adjustment.
The line item section shows the selected inventory item. Here, either enter the new quantity into the “New Qty” field or enter the difference between the “Qty on Hand” and the “New Qty” into the “Change in Qty” field. If you use the “Change in Qty” field to note a loss of items, enter the change as a negative number. However, also note that you only need to perform data entry within one of these fields, as the other automatically recalculates based on the value you enter in the other.
In the “Memo” field, enter the reason for the quantity adjustment. If you have classes and locations enabled, you can also use the “Class” column and the “Location” drop-down to classify this transaction, as needed. When finished, click the “Save and close” button in the toolbar at the bottom of the window to save the change and close the window.
How to Adjust the Starting Value:
If needed, you can also adjust the starting values for inventory items. Please note that changing an inventory item’s starting value can have repercussions across many accounts. If you are not sure of what to do, it is best to consult your accountant before making any changes.
To change the starting value of an inventory item in the “Products & services” page, edit the item for which to adjust the starting value by clicking its “Edit” link under its “Action” column to open its product/service information pane. This time, click the “Starting value” link by the “Quantity on hand” label in the “Inventory info” section to open an “Inventory starting value” window.
In the “Inventory starting value” window, enter the correct initial quantity on hand of the item into the “Initial quantity on hand” field. Enter the date as of which that starting inventory is correct into the “As of date” field. Enter the initial cost into the “Initial cost” field. Then use the “Inventory adjustment account” drop-down to select the correct account used to balance the inventory asset account. If you are unsure, check with your accountant.
The “Memo” field contains a default memo field value, and you can change it, if desired to note the reason for the adjustment in more detail. If you have classes and locations enabled, you can also use the “Class” and “Location” drop-down to classify this transaction, if needed. You can enter a different reference number or code into the “Reference no.” field, if you want to change its default value. When finished, click the “Save” button to save the starting value adjustment for the inventory item and its related accounts.


