How to Create a Credit Memo in QuickBooks Online
How to Create a Credit Memo in QuickBooks Online: Video
This video lesson, titled “How to Create a Credit Memo in QuickBooks Online,” shows you how to create a credit memo in QuickBooks Online. This video lesson is from our complete QuickBooks Online tutorial, titled “Mastering QuickBooks Online Made Easy.”
Overview:
Create the Credit Memo:
To create a credit memo in QuickBooks Online, hover over the “+ Create” button in the Navigation Bar and select “Credit memo” under the “Customers” heading to open the “Credit Memo” window. You use this window much like you use the “Sales Receipt” window.
Select the Customer and Enter or Verify the Customer Info:
First, select a customer from the “Customer” drop-down. Their email appears in the “Email” field to the right, if one was entered. To send it later, if desired, check the “Send later” checkbox. To add cc or bcc emails, if needed, click the “Cc/Bcc” link by the “Email” field, enter the addresses into the menu that appears, and then click the “Done” button in the menu.
Enter the Credit Memo Transaction Data:
Select the credit memo’s date from the “Credit Memo Date” field. The credit memo’s number appears in the “Credit Memo no.” field, and you can change it if you enabled custom transaction numbers in your company file’s settings. If classes are assigned per transaction or locations are enabled, you can use the “Class” and “Location” drop-downs at the right side of this form to select your desired choices.
Enter the Products and Services to Credit or Create/Select a General Credit:
Next, click into the “Product/Service” column in the line items section to select the products or services for which the customer is being credited and enter the associated line items’ return refund information. Alternatively, to create a new general “Credit” line item, select the “+Add new” choice from the “Product/Service” drop-down and create it in the product/service information pane that then appears. Take care if you create a general credit to select the correct income account and set its correct taxable setting. The “Total Credit” shown towards the lower-right corner of the window shows the total credit amount.
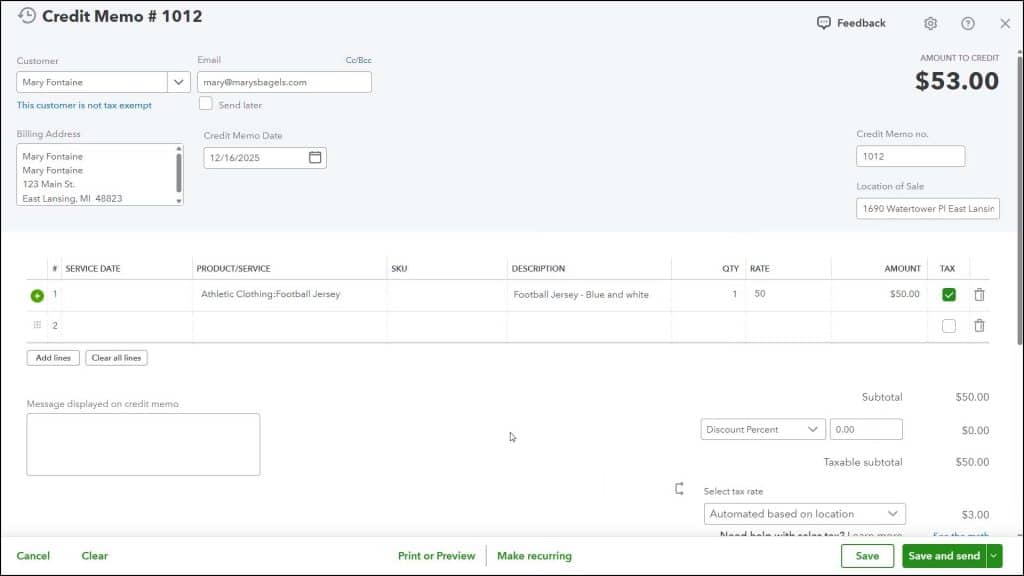
Save the Credit Memo:
When finished, save the credit memo and select an optional follow-up action by either clicking the “Print or Preview” button and selecting the “Print or Preview” command to save and print it, clicking the “Save” button to simply save it, or selecting a choice from the “Save and send/Save and new/Save and close” drop-down button, all of which appear in the toolbar at the bottom of the window.


