Sync Notebooks in OneNote – Tutorial
Sync Notebooks in OneNote: Video Lesson
This video lesson, titled “Synching Notebooks,” shows how to sync notebooks in OneNote. This video is from our complete OneNote training, titled “Mastering OneNote Made Easy v.2016-2013.”
Sync Notebooks in OneNote: Overview
By default, you sync notebooks in OneNote automatically. So if multiple people are accessing a notebook at once, their changes are updated and saved as they are made. However, there may be times when you want to sync notebooks in OneNote manually.
To sync notebooks in OneNote manually, click the Notebook drop-down and right-click on a notebook to reveal a pop-up menu. Then click the “Notebook Sync Status” command. The “Shared Notebook Synchronization” dialog box will launch. If you prefer to perform synchronization yourself, you can click to select the “Sync Manually” option in the top section of the dialog box. At any point, you can click the “Sync All” button in this dialog box to perform the synchronization manually.
You can also switch back to automatic synchronization at any time by clicking the “Sync automatically whenever there are changes” option, instead. If you have more than one notebook shared, you can also select individual notebooks and click the “Sync Now” button to sync only that notebook. When you are done, click the “Close” button to save your changes.
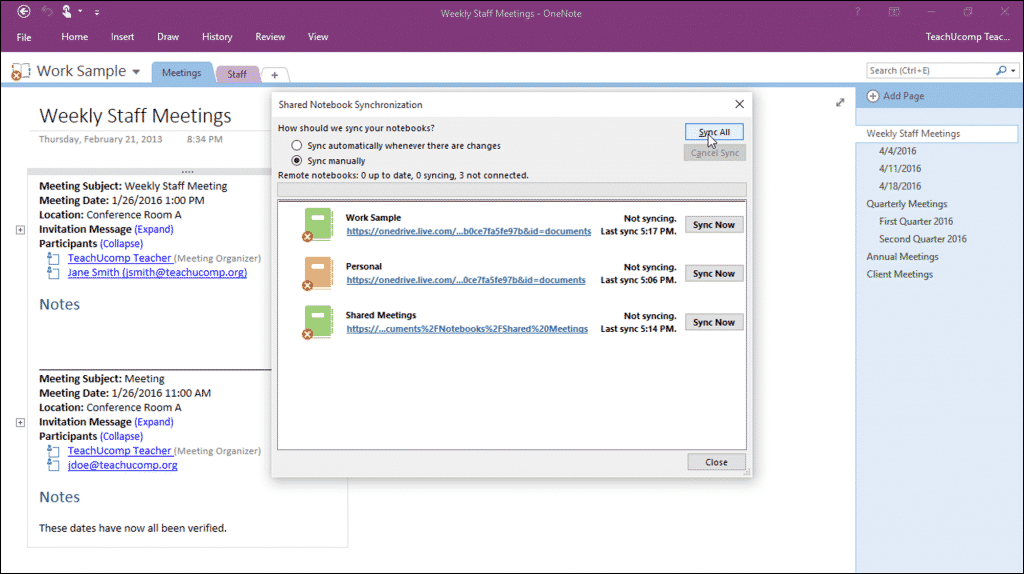
Sync Notebooks in OneNote – Tutorial: A picture of the “Shared Notebook Synchronization” dialog box in OneNote 2016.
Sync Notebooks in OneNote: Instructions
- To sync notebooks in OneNote manually, click the Notebook drop-down, right-click a notebook, and click the “Notebook Sync Status” command in the pop-up menu that appears.
- The “Shared Notebook Synchronization” dialog box will open.
- Then click the “Sync manually” option in the top section.
- To perform a manual sync, click the “Sync All” button.
- To switch back to automatic synchronization, click the “Sync automatically whenever there are changes” option in the “Share Notebook Synchronization” dialog box.
- If you have multiple shared notebooks and want to sync a specific notebook, select the individual notebook and click the “Sync Now” button.
- To save any changes you made and close the dialog box, click the “Close” button.
