How to Use the Remove Tool in Photoshop: Video
This video lesson, titled “Learn How to Use the Remove Tool in Adobe Photoshop: A Training Tutorial,” shows how to use the Remove Tool in Photoshop. This video lesson is from our complete Photoshop tutorial, titled “Mastering Photoshop Made Easy.”
Overview of How to Use the Remove Tool in Photoshop:
The Remove Tool in Photoshop uses AI to remove content you select with the tool in a raster layer and then fill-in the selected area based on surrounding content, much like the Content-Aware Fill command. However, this tool uses AI to perform the task automatically.
To use the Remove Tool in Photoshop, click the Remove Tool button in the Tools panel. This tool shares the same button as the Spot Healing Brush Tool, Healing Brush Tool, Patch Tool, Content-Aware Move Tool, and Red Eye Tool, and the button shows the icon of the tool last selected. So, if needed, click and hold down on this button in the Tools panel and then select “Remove Tool” from the side menu that appears to select it. Note that you cannot create tool presets for the Remove Tool in Photoshop.
To set the options for the Remove Tool, make your selections in the Options bar Control panel. To set the size of the brush you use to select the content in the area to remove, click the “Set the brush size” drop-down. Then use the slider to set the pixel size or type it into the “Size” field. Optionally, to always use pen or stylus pressure for the brush size if using a pen or stylus and tablet, click the “Always use pressure for size” button in the Options bar Control panel.
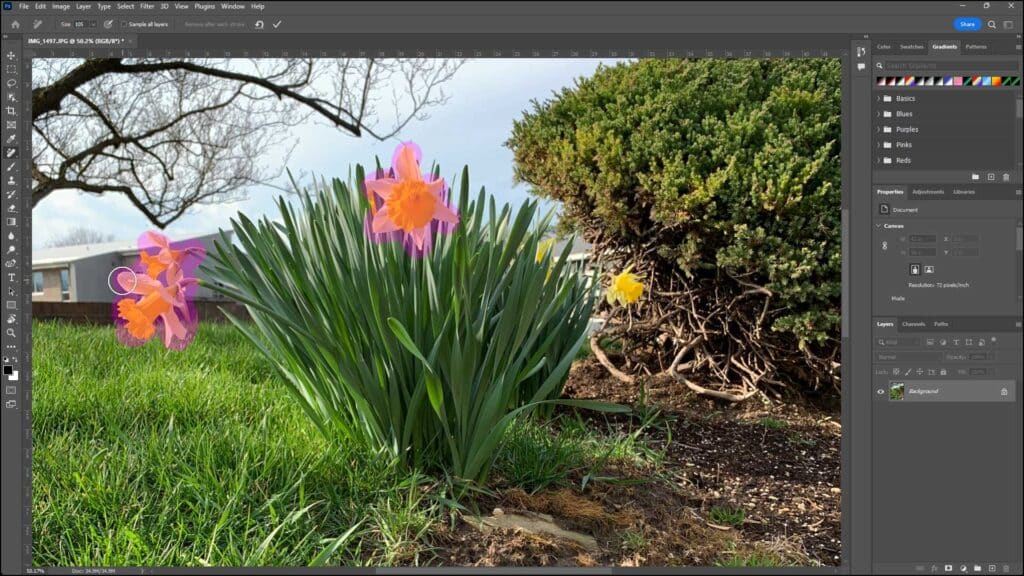
A picture showing how to use the Remove Tool in Photoshop.
To sample and select content from all visible layers when using the tool, check the “Sample all layers” checkbox in the Options bar Control panel. To automatically apply your changes with the Remove Tool after each brush stroke application, check the “Remove after each stroke” checkbox in the Options bar Control panel. Alternatively, to apply multiple strokes with the Remove Tool which you then then apply as a batch, uncheck the “Remove after each stroke” checkbox.
Next, if you did not check the “Sample all layers” checkbox, select the raster layer within which to remove content in the Layers panel. Then, if you checked the “Remove after each stroke” checkbox, click and drag over the content to remove using a single brush stroke and ensure you select all the content to remove. When you release the mouse button and finish the stroke, all content under the selected area is then automatically removed and replaced with adjacent content.
Alternatively, if you unchecked the “Remove after each stroke” checkbox, then click and drag over all the content areas in the raster layer to remove to mark them for removal. If needed, to reset your Remove Tool brush marks, click the “Reset all strokes” button in the Options bar Control panel. After making your selections with the Remove Tool, to then remove all content selected by the multiple brush strokes and replace it with adjacent content, click the “Apply to current strokes” checkmark button in the Options bar Control panel.
Instructions on How to Use the Remove Tool in Photoshop:
- To use the Remove Tool in Photoshop, click the Remove Tool button in the Tools panel.
- This tool shares the same button as the Spot Healing Brush Tool, Healing Brush Tool, Patch Tool, Content-Aware Move Tool, and Red Eye Tool, and the button shows the icon of the tool last selected.
- So, if needed, click and hold down on this button in the Tools panel and then select “Remove Tool” from the side menu that appears to select it.
- Note that you cannot create tool presets for the Remove Tool in Photoshop.
- To set the options for the Remove Tool, make your selections in the Options bar Control panel.
- To set the size of the brush you use to select the content in the area to remove, click the “Set the brush size” drop-down.
- Then use the slider to set the pixel size or type it into the “Size” field.
- To always use pen or stylus pressure for the brush size if using a pen or stylus and tablet, click the “Always use pressure for size” button in the Options bar Control panel.
- Optionally, to sample and select content from all visible layers when using the tool, check the “Sample all layers” checkbox in the Options bar Control panel.
- To automatically apply your changes with the Remove Tool after each brush stroke application, check the “Remove after each stroke” checkbox in the Options bar Control panel.
- Alternatively, to apply multiple strokes with the Remove Tool which you then then apply as a batch, uncheck the “Remove after each stroke” checkbox.
- Next, if you did not check the “Sample all layers” checkbox, select the raster layer within which to remove content in the Layers panel.
- Then, if you checked the “Remove after each stroke” checkbox, click and drag over the content to remove using a single brush stroke and ensure you select all the content to remove.
- When you release the mouse button and finish the stroke, all content under the selected area is then automatically removed and replaced with adjacent content.
- Alternatively, if you unchecked the “Remove after each stroke” checkbox, then click and drag over all the content areas in the raster layer to remove to mark them for removal.
- If needed, to reset your Remove Tool brush marks, click the “Reset all strokes” button in the Options bar Control panel.
- After making your selections with the Remove Tool, to then remove all content selected by the multiple brush strokes and replace it with adjacent content, click the “Apply to current strokes” checkmark button in the Options bar Control panel.