 MY CART
How to Create a Folder in File Explorer in Windows 11: Video Lesson
This video lesson, titled “How to Create a New Folder within File Explorer in Windows 11: A Windows 11 Training Tutorial,” shows you how to create a new folder in File Explorer in Windows 11. This video lesson is from our complete Windows tutorial, titled “Mastering Windows Made Easy.”
Overview:
After you begin to create and save files in Windows 11, you may want to create additional folders and subfolders to help organize your files. Organizing files into folders makes it easier to locate and manage your work. You can create a new folder within most locations that you can access through File Explorer.
How to Create a New Folder in File Explorer:
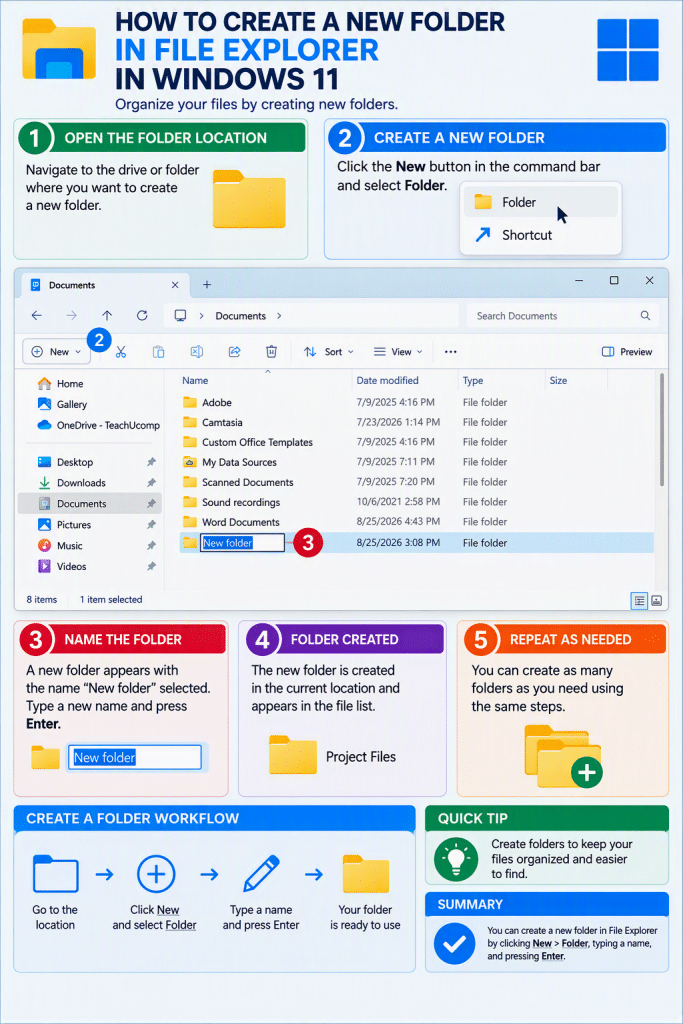
To create a new folder, first open the location in which you want to create the folder so that its contents appear in the main pane of the File Explorer window. Then click the “New” button in the command bar at the top of the window. In the menu that appears, click the “Folder” command to create a new folder.
Windows then creates a new folder in the main pane and highlights its default name, which is “New folder.” Type a new name for the folder to replace the default name. Then click in a blank area of the window or press the “Enter” key on your keyboard to confirm the new folder name.
In some locations, such as shared network drives, you may need permission to create new folders. If you do not have the required permission, Windows may prevent you from creating the folder or display a message indicating that access is denied. In this case, you may need to contact a network administrator or use a location where you have appropriate access rights.