How to Create Custom Form Styles in QuickBooks Online
How to Create Custom Form Styles in QuickBooks Online: Video
This video lesson, titled “How to Create Custom Form Styles in QuickBooks Online,” shows you how to customize Modern invoices and estimates and also create custom form styles in QuickBooks Online. This video lesson is from our complete QuickBooks Online tutorial, titled “Mastering QuickBooks Online Made Easy.”
Overview:
The Modern Form Style Template for Invoices and Estimates:
The newer “Modern” form style template used by invoices and estimates contains an “Edit” data entry view, an “Email view,” a “Payor view” for invoices, and a “PDF view.” Other sales forms use the older “Standard” custom form style template, which is also available as a form style for invoices and estimates, too.
The PDF view of a sales form is separate from the look of its data entry screen. If you want to customize the look of the PDF for a sales form you send to customers, you can use the older custom form styles. However, if you use a custom form style in QuickBooks Online, it can change the data entry screens a bit, too.
Changes When Using a Custom Form Style Versus the Modern Form Style:
For example, if you use a custom form style for your invoices, then QuickBooks Online removes the “Email view” and “PDF view” tabs from the “Invoice” data entry screen, as those features are only compatible with the new “Modern” form style. Line item numbering in the “Modern” form style for invoices is also unavailable if using the older custom form styles. However, while changing the fields available in the “Modern” form style will also add or remove the fields in its PDF view, many users still prefer to use the older custom form styles for its slightly more robust PDF customization options.
Do You Need to Use a Custom Form Style for Invoices?
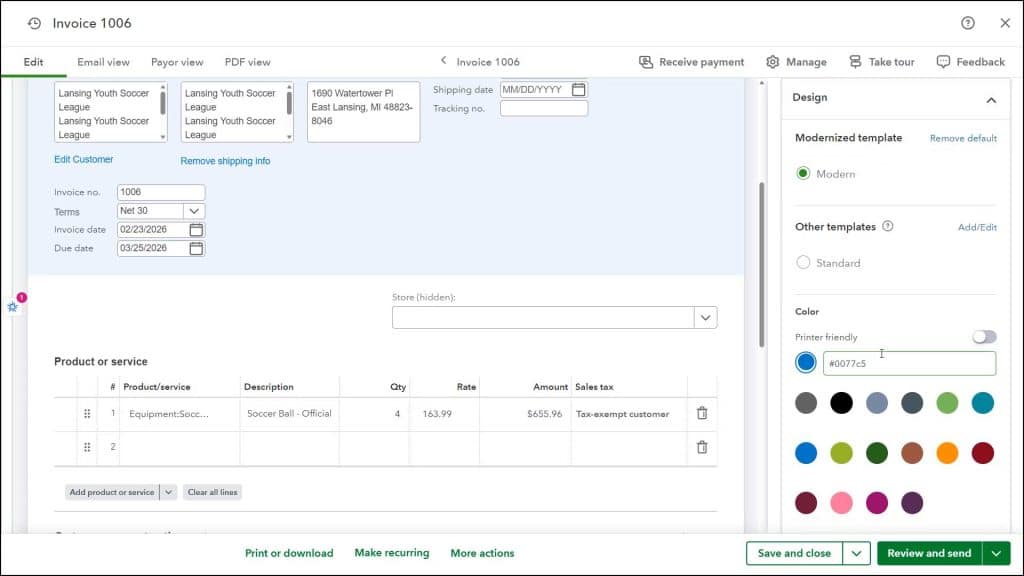
In short, many companies may not need to use custom form styles, as many of their customization features also appear within the “Design” section of the “Manage” pane at the right side of the “Invoice” data entry window. By default, the invoice form in QuickBooks Online uses the “Modern” template within the “Modernized templates” section of the “Design” pane and your design changes in this pane change the settings of that template, unless you select a different, custom form template, which appear in the “Other templates” section.
How to Customize Invoices and Estimates Using the Modern Form Style:
To customize the appearance of invoices and estimates if using the default “Modern” template, click the “Manage” button in the toolbar at the top of the “Invoice” or “Estimate” window to show or hide a pane at the right side of the window. To change the pane’s settings, click a customization settings category button to show its options below it. Then click to toggle the switches on or off or select choices using the buttons in a section to customize both the data entry version of the form and its modern template.
Customization Settings:
The “Customization” settings section contains toggle switches that you can enable or disable to show or hide the related fields. The “Table content” section shows the fields that appear in the line items table. To edit these labels, if desired, click the “Edit labels” link here, type the new labels you want into the “Edit labels” pane that then appears, and click the “Save” button in it to save your changes.
Payment Options or Discounts and Fees Settings:
The “Payment options” settings section for invoices or the “Discounts and Fees” settings section for estimates lets you click toggle switches to turn on or off all the payment methods, as well as the invoice total, shipping, deposit for invoices, discount, and multicurrency features.
Design Settings:
The “Design” settings section lets you select an option button to choose the default “Modern” template or one of the custom form templates. If you select the “Modern” template, then you can select the form’s color and font here, too. The “Payment link” toggle switch lets you add a payment link to the PDF invoice if using QuickBooks Payments.
Scheduling Settings:
The “Scheduling” settings section contains toggle switches and settings for recurring versions of the form, customer send options, and automatic invoice reminders.
How to Create a New Custom Form Style:
Alternatively, you can create and apply a custom form style for invoices, estimates, sales receipts, and sales orders in QuickBooks Online Plus. To create a new custom form style in QuickBooks Online, click the “Settings” button in the QuickBooks Online toolbar and then click the “Custom form styles” link under the “Your Company” heading in the menu that appears to open the “Custom form styles” page.
Click the “New style” drop-down button in the upper-right corner of the page and then click the type of form style to create by selecting either “Invoice,” “Estimate,” “Sales receipt,” or “Sales order” from the drop-down menu that appears. The new form style then opens in a new window where you can customize its settings. All changes you make in this window are saved automatically when you click the “Preview PDF” or “Done” button.
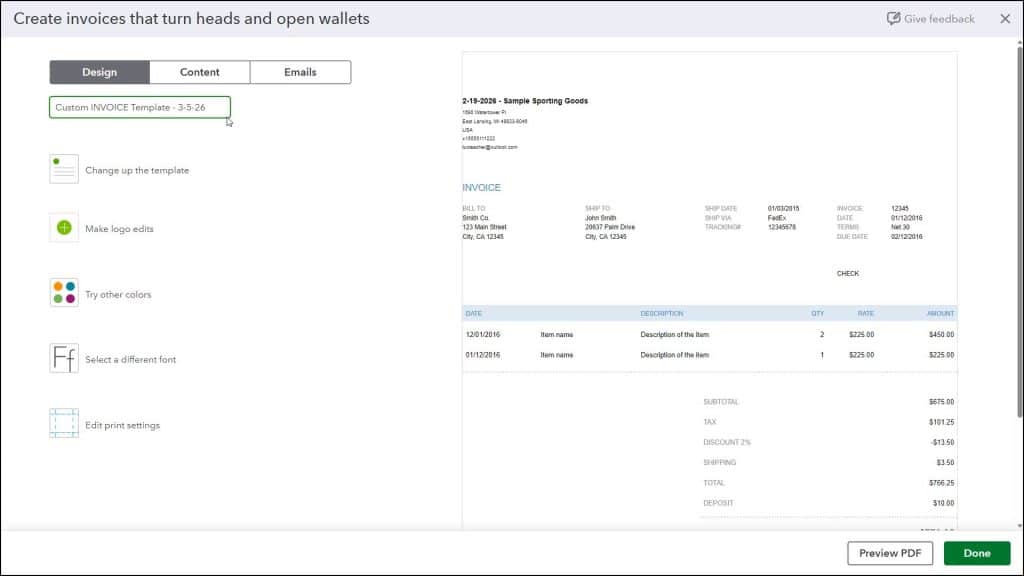
Name the Custom Form Style, Change Its Settings, and Save It:
To name the custom form style, type a name into the field in the upper-left corner of the window. To customize the form, then change the settings on its “Design,” “Content,” and “Emails” tabs. We will examine the settings on each tab in detail in separate lessons in this chapter.
To close the form without saving it, click the “X” button in the upper-right corner of the form customization window. Then click the “Exit without saving” button in the confirmation dialog box that appears. If you do not do this, then each form you create is saved to QuickBooks Online, although you can also delete them after saving them in the “Custom form styles” list.
In the form customization window, you use the buttons in the toolbar at the bottom of the window to preview and close the form. To save the form and preview its PDF, click the “Preview PDF” button to open a PDF preview of the form in a new window. You can close this window after viewing it. To save the form into the “Custom form styles” list after creating it and changing its name, click the “Done” button in the toolbar.


