 MY CART
How to Rename Files and Folders in File Explorer in Windows 11: Video Lesson
This video lesson, titled “How to Rename Files and Folders within File Explorer in Windows 11: A Windows 11 Training Tutorial,” shows you how to rename a file or rename a folder within File Explorer in Windows 11. This video lesson is from our complete Windows tutorial, titled “Mastering Windows Made Easy.”
Overview:
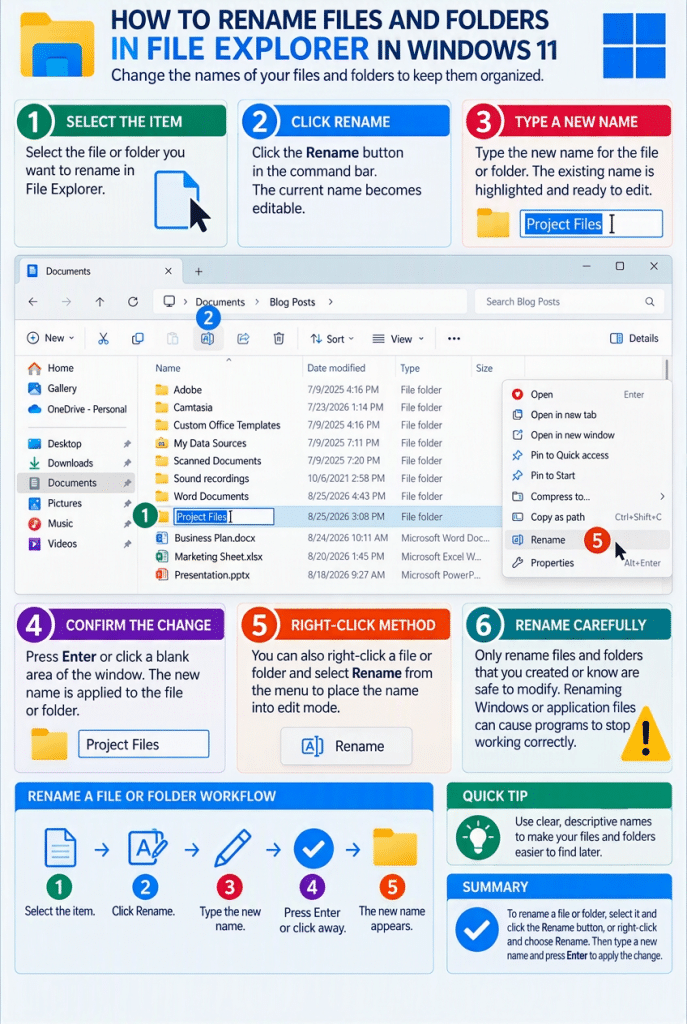
You can rename files and folders you have created to reflect changes made to their contents or to correct naming errors. Renaming items clearly can help you organize your files and make them easier to locate. However, you should be careful when renaming items that were not created by you.
Many files and folders in your computer are used by Windows or by installed applications. Renaming these items could cause programs to stop working correctly or prevent Windows from functioning properly. For this reason, you should only rename files and folders that you have created or that you are certain are safe to modify.
How to Rename a File or Folder Using File Explorer in Windows 11:
To rename a file or folder in File Explorer, first select the item you want to rename in the main pane. Then click the “Rename” button in the command bar at the top of the window. This action highlights the current name and places it into edit mode so you can type a new name.
Type the new name for the file or folder. Then click in a blank area of the window or press the “Enter” key on your keyboard to confirm the new name. The updated name is then applied to the selected item.
You can also rename a file or folder by right-clicking it. In the menu that appears, click the “Rename” command to place the name into edit mode. Then type the new name and confirm it in the same way.