How to Track Project Costs in QuickBooks Online
How to Track Project Costs in QuickBooks Online: Video
This video lesson, titled “How to Track Costs for Projects in QuickBooks Online Plus,” shows you how to track project costs in QuickBooks Online. This video lesson is from our complete QuickBooks Online tutorial, titled “Mastering QuickBooks Online Made Easy.”
Overview:
Enable the Project Cost Tracking Settings:
Before you track costs for projects in QuickBooks Online Plus or higher, ensure the “Track expenses and items by customer” toggle switch in the “Bills and expenses” section of the “Expenses” category in the “Settings” window is set to the “On” position. Also, to bill for expenses and items, ensure the adjacent “Make expenses and items billable” toggle switch is set to the “On” position and set any adjacent default markup and tracking information, as desired. Then save the settings by clicking the “Save” button at the bottom of the “Expenses” settings and close the “Settings” window.
Select the Customer/Project in Purchasing Forms:
To track project costs in QuickBooks Online Plus or higher, select the name of the billable customer or project from the “Customer / Project” column within the line item area in any expense, check, bill, and/or purchase order for the customer or project, as needed. Alternatively, you can also create many of these purchasing transactions directly from a project’s details page to automatically record the information in this column in the transaction’s form.
For costs recorded as part of a process or ones entered independently from the project details page, like when creating a purchase order from an estimate, you must simply remember to select the value from the “Customer / Project” field when creating the transaction. This tracks the line item’s cost to the project or customer you select.
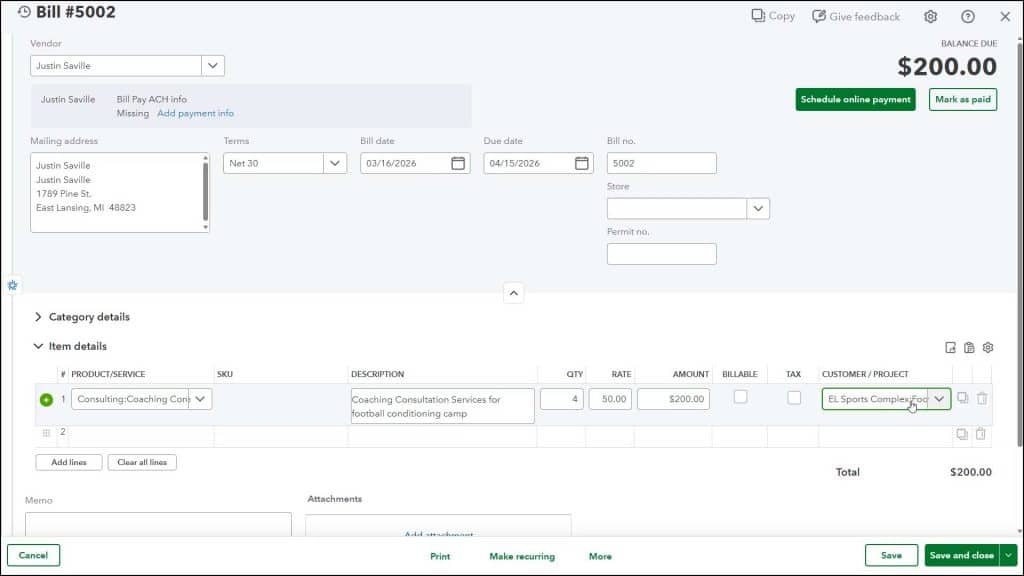
If Needed, Mark the Costs as Billable:
Additionally, if needed, to mark any of these customer or project costs as billable to the selected customer or project, check the adjacent “Billable” column’s checkbox within the line item’s row. However, note this column doesn’t appear in the “Purchase Order” window, as purchase orders do not affect accounts until they are converted into a bill. However, it does appear within the “Bill” window when copying or adding information from a purchase order to a bill, so make sure to select it there, if needed. After entering the remainder of the form’s information, then save it, as usual.


