 MY CART
How to Zip Folders in File Explorer in Windows 11: Video Lesson
This video lesson, titled “How to Zip Folders within File Explorer in Windows 11: A Windows 11 Training Tutorial,” shows you how to zip files and zip folders to compress them within File Explorer in Windows 11. This video lesson is from our complete Windows tutorial, titled “Mastering Windows Made Easy.”
Overview:
What is a Zipped File in Windows?
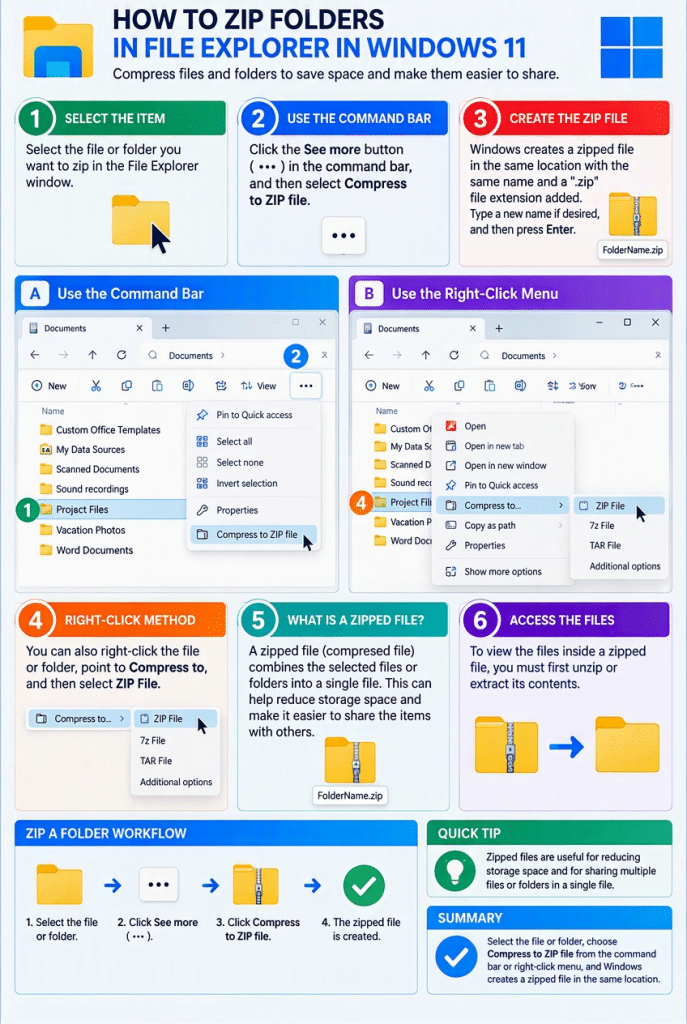
You can zip a file or folder in the File Explorer window to compress its contents into a single compressed file. This zipped file can be used to reduce storage space or make it easier to share files with others. To access the contents of a zipped file, you must first unzip it to restore its contents.
How to Zip a File or Folder in Windows 11:
To zip a file or folder in Windows 11, select the file or folder in the main pane of the File Explorer window. Then click the “See more” button in the command bar at the top of the window. In the menu that appears, click the “Compress to ZIP file” command to create a zipped version of the selected item.
Windows then creates a zipped file in the same folder location and highlights its name. The zipped file uses the same name as the original file or folder, with a “.zip” file extension added to it. If desired, type a new name for the zipped file and then press the “Enter” key on your keyboard or click in a blank area of the window to set its name.
You can also zip a file or folder by using the context menu. To do this, right-click the file or folder in the main pane, roll over the “Compress to…” command, and then select “ZIP File” in the side menu that appears. This method produces the same result and may be faster for some users.