Report Groups in QuickBooks Online
Report Groups in QuickBooks Online: Video
This video lesson, titled “How to Use Report Groups in QuickBooks Online,” shows you how to manage custom reports by using report groups in QuickBooks Online. This video lesson is from our complete QuickBooks Online tutorial, titled “Mastering QuickBooks Online Made Easy.”
Overview:
How to View Custom Reports and Report Groups:
Report groups in QuickBooks Online let you save all the custom reports in the report group as a single PDF and/or schedule sending the reports via email. To view report groups in QuickBooks Online, hover over “Reports” in the Navigation Bar and then click the “Custom reports” link in the “Reports & Analytics” menu that appears. Alternatively, if the “Reports & analytics” bar already appears onscreen, you can just click the “Custom reports” link within it.
How to Print or Download All Reports in a Report Group:
Either way, the “Custom reports” page then opens to the right and shows your saved custom reports and any report groups you have created. To print or download all the reports in a report group as a single PDF, click the drop-down under its “Action” column. Then click the “Export as PDF” link to open the “Print or save as PDF” window. A preview of the single PDF created from the combined reports in the report group appears in this window.
To print the PDF, click the “Print” button in the toolbar at the top of the PDF preview to open your web browser’s “Print” dialog box, where you can set the print settings and then click the “Print” button to finish. Alternatively, to download the PDF, click the “Save as PDF” button at the bottom of the window. To close the window, when finished, click the “Close” button within it.
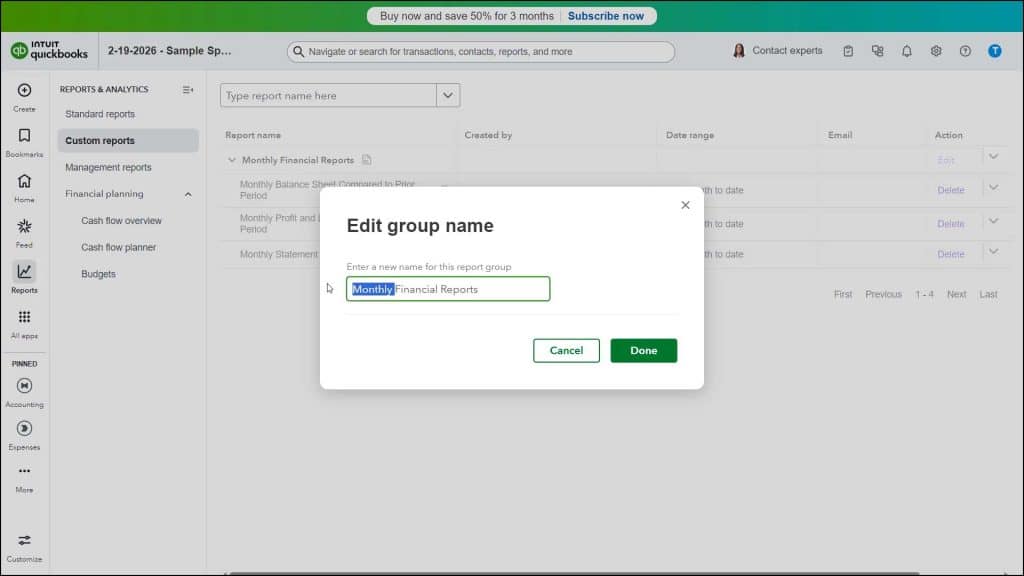
How to Rename a Report Group:
To rename a report group in QuickBooks Online, click the “Edit” link under its “Action” column to open an “Edit group name” window. Then type the new name into the field shown and click the “Done” button.
How to Delete a Report Group:
To delete a report group in QuickBooks Online, click the drop-down under its “Action” column and then select the “Delete group” command. Then click the “Delete” button in the confirmation window that appears to finish. Note that deleting a report group doesn’t delete the reports it contains, but it does ungroup them. The reports still appear within the custom reports list.
How to Schedule and Send an Email Containing All Reports in a Report Group or a Single Custom Report:
To schedule and send an email for either a report group or a single custom report in QuickBooks Online, click the drop-down under its “Action” column and then select the “Create a schedule” command to open the “Create workflow” window. To change the workflow’s name, type it into the “Workflow name” field. To set its email schedule, set the desired values for the “Start,” “Repeat every,” and “End” settings in the “Create and send recurring report” section.
In the “How would you like this action to happen?” section, then enter the email addresses of the email recipients, separated by commas, into the “Send to” field. To show a “CC” or “BCC” email address field, click the “Add CC” and/or “Add BCC” links and then enter emails addresses into those fields, too.
Type the desired email subject into the “Subject” field. Select the file format of the report(s) to send in the email by choosing the desired “Format” file type option button. Next, type the desired email message into the “Message” field. If needed, to insert a variable into either the “Subject” or “Message” field while typing, type the pound sign (hashtag) symbol and then select the desired variable from the drop-down menu that appears.
To then save and enable the email schedule, click the “Save and turn on” button. Alternatively, to save the email schedule but not enable it, click the “Save” button. Alternatively, to cancel the report email workflow, click the “Cancel” button, instead, and click “Discard” in the confirmation prompt.
How to Change the Report Group for a Custom Report:
To change the report group membership for a single custom report, click the drop-down under its “Action” column and then select the “Change group” command to open an “Add (Report name) to a group?” window. Then use the drop-down in this window to select the name of the report group to which to move the report and click the “Done” button. Alternatively, to remove the report from its current report group, instead click the “Remove from group” link and then click the “Done” button.
How to Export a Single Custom Report as a PDF or Excel Workbook or Add It to a Management Report:
To see the additional actions you can perform on a single custom report in QuickBooks Online, click its “Action” column’s drop-down. To add the report to a management report, select the “Add to Management reports” command. Then select whether to create a new management report or add the report to an existing management report in the window that opens and type the new management report’s name or select it from the drop-down that appears, as needed. Then click the “Add” button in the window to finish.
To export the custom report as a PDF or Excel workbook, select either the “Export as PDF” or “Export as Excel” command from the “Action” column to immediately download a version of the custom report in the selected file format.


