How to Apply Automatic Late Fees in QuickBooks Online
How to Apply Automatic Late Fees in QuickBooks Online: Video
This video lesson, titled “How to Apply Automatic Late Fees in QuickBooks Online,” provides a concept overview of shows you how to check and change the default late fee settings in QuickBooks Online and then customize the late fees settings per customer, if needed. It also shows you how to manually apply a customer late fee in an invoice, if needed. This video lesson is from our complete QuickBooks Online tutorial, titled “Mastering QuickBooks Online Made Easy.”
Overview:
How to Check and Change the Default Late Fee Settings:
QuickBooks Online can apply automatic late fees to customers. It does this according to the default late fee settings within the “Late Fees” section of the “Sales” category in the “Account and Settings” window in your company, as shown in the earlier lesson titled “Customizing Your Sales Settings.”
How to Customize the Late Fee Settings for a Customer, if Needed:
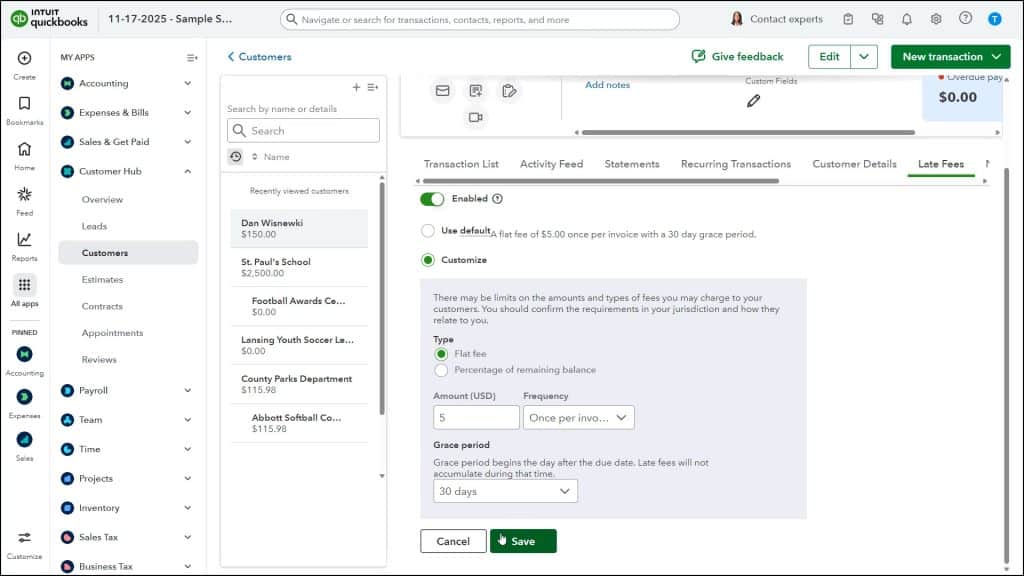
After you enable the default automatic late fees, you can then customize the late fee settings for individual customers in your “Customers” page, if needed, by clicking their name in the Customers list, then clicking the “Late Fees” tab that appears, making your changes to the individual customer’s late fees on this tab, and then clicking the “Save” button. This lets you change the settings for specific customers that deviate from your default late fees, if needed.
How QuickBooks Online Assesses Late Fees on Invoices:
After automatic late fees are enabled in QuickBooks Online, they are assessed on new invoices according to the settings. Late fees are applied for up to 6 months or until paid. Late fees are assessed once per day, starting at 12 am PST. They should finish being applied for the day by 7 am PST. Late fees are not assessed retroactively on existing overdue invoices when late fees are first enabled. They are also only applied to invoices up to six months overdue. They are also not applied to unpaid invoices in closed periods.
How Late Fees Appear in QuickBooks Online:
Late fees appear as line items in the corresponding invoices. Like all line items, you can delete them by clicking their “Trash” icon at the right end of the line item to delete them, if needed. They will also appear in customer statements that show the detail lines of invoices if you enable the “List each transaction including all detail lines” option within the “Statements” section of the “Sales” category in the “Account and Settings” window, as discussed in the earlier lesson titled “Customizing Your Sales Settings.”
How to Manually Add a Late Fee Item to an Invoice, if Needed:
However, if the automatic late fees are not assessed on an invoice because it falls within one of the exceptions previously noted, then you must manually add a “Late Fee” line item to the existing late invoice to charge late fees on the invoice. You can create this “Late Fee” item in the “Products & services” page as either a new non-inventory item type or service item type, as needed.


