How to Cancel a Company in QuickBooks Online
How to Cancel a Company in QuickBooks Online: Video
This video lesson, titled “How to Cancel a Company File in QuickBooks Online,” shows you how to cancel a company in QuickBooks Online. It also shows you how to purge a new company file in QuickBooks Online to delete all its data but keep the company file. Purging a new company helps if you import data incorrectly when you set up a new company and you just want to start over again. This video lesson is from our complete QuickBooks Online tutorial, titled “Mastering QuickBooks Online Made Easy.”
Overview:
How to Cancel Subscriptions for a Company in QuickBooks Online:
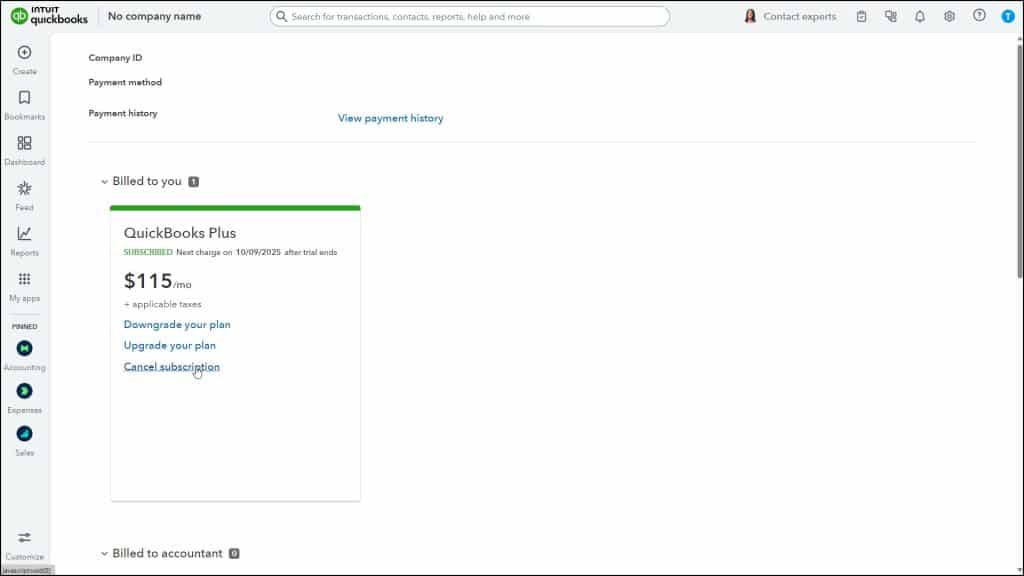
To cancel a company file in QuickBooks Online, click the “Settings” button in the QuickBooks Online toolbar. Then select the “Subscriptions and billing” link in the drop-down menu under the “Profile” heading to open the “Subscriptions and billing” window. Then click the “Cancel subscription” link within all the active subscription widgets to cancel the company’s linked subscriptions.
A window appears, asking you to confirm you want to cancel the company file. Click the “Cancel plan” button to cancel your subscription. You MUST fully complete the cancellation steps, or you will not cancel your subscription. You will continue to be charged your subscription fees until you complete all the cancellation steps.
FOR 30-DAY FREE TRIAL SUBSCRIBERS WHO CHOOSE NOT TO CONTINUE WITH QUICKBOOKS ONLINE, IT IS VERY IMPORTANT TO NOTE THAT YOU MUST ACTIVELY CANCEL THE COMPANY FILE BEFORE THE 30-DAY EXPIRATION DATE TO AVOID BEING AUTOMATICALLY CHARGED BY INTUIT! Any data you entered is saved for 90 days after the trial period ends. You can export the data before the trial period ends to save it. Otherwise, after 90 days has passed, the data is permanently deleted from the Intuit/QuickBooks servers.
How to Purge a Company in QuickBooks Online:
If your company file is still in its trial period or within the first 60 days of your subscription, you can purge the company data. This deletes all existing data from your company file but keeps the company file itself. To purge company data, open the company file and go to the “Dashboard” page. In the address bar of your web browser, change the URL, which should look like https://qbo.intuit.com/app/get-things-done or https://qbo.intuit.com/app/homepage, to delete either the term “get-things-done” or “homepage” and replace it with “purgecompany.”
Then press the “Enter” key on your keyboard while still in the address bar to open the “Are you sure you want to wipe your QuickBooks Online company?” page. This page lists the data to delete. In the lower-right corner of the page is a textbox into which you must type “YES” and then click the “OK” button to start the data purge process. Otherwise, click the “Cancel” button to return to the Dashboard page.
In the next screen, select the industry choice for the company file from the drop-down, if needed, and then select an option button to choose whether to create new accounts in the chart of accounts based on your industry selection or to manually create all accounts in your company file. Then click the “Wipe Data” button to finish.
Be absolutely sure you want to delete the company data before purging it. This process is NOT reversible. After purging the company data, your company file still exists. You can then use the same company file and enter new information, cancel your subscription, or start a new company file. If you cancel a full subscription, your data is saved for one year and then permanently deleted from the Intuit/QuickBooks servers. During this year, you will have read-only access to the data. You cannot manipulate the data. However, you can run reports.


