How to Change Custom Form Emails Settings in QuickBooks Online
How to Change Custom Form Emails Settings in QuickBooks Online: Video
This video lesson, titled “How to Change the Custom Form Emails Settings in QuickBooks Online,” shows you how to change custom form Emails settings in QuickBooks Online. This video lesson is from our complete QuickBooks Online tutorial, titled “Mastering QuickBooks Online Made Easy.”
Overview:
To change the email settings for the different types of custom forms in the form customization window of QuickBooks Online, click the “Emails” tab at the top of the window. The “Emails” tab lets you view and change the email settings for a form type. Unlike the other form settings, the “Emails” settings are shared. Some settings are shared by all forms, while others are shared by only the same form type. So, you can edit the “Emails” settings for any form type in any form customization window of that type.
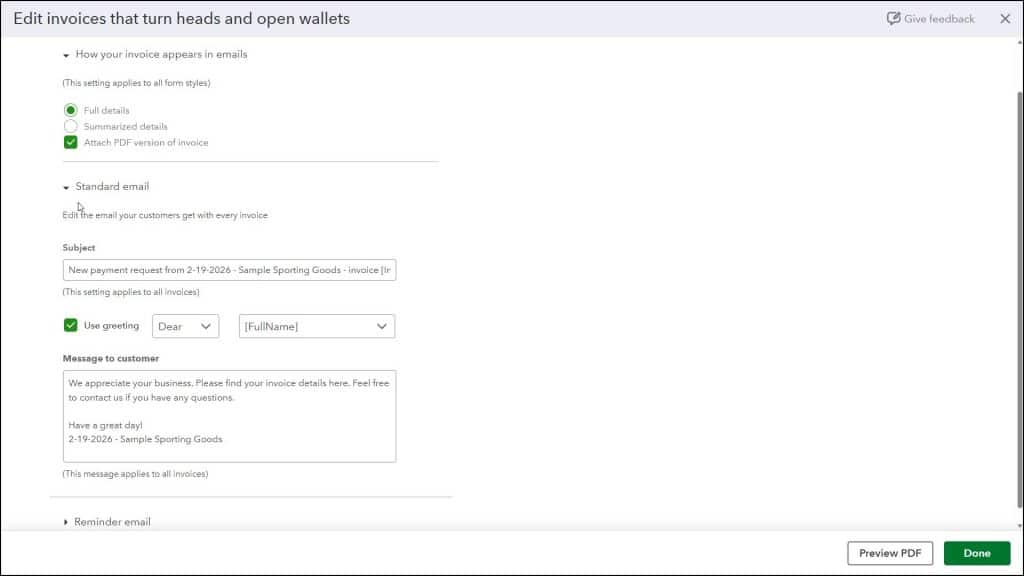
Choose the Level of Form Transaction Details to Show in Emails:
The “How your (form type) appears in emails” setting, where (form type) is the name of the current type of form you are customizing, is a setting shared by all form types. So, the choice you make here applies to all the forms you send. You can choose to send either the “Full details” or “Summarized details” in forms by selecting the desired option button. To attach a PDF, check the “PDF Attached” checkbox or the “Attach PDF version of invoice” checkbox, depending on the form.
Customize the Subject and Body of the Emails:
The “Standard email” settings apply to forms of the same form type. For the “Invoice” form type only, there are also “Reminder email” settings that are shared by all invoices. When customizing an “Invoice” form type, you can click either section’s label to expand and collapse the settings within that section. The settings are the same for both sections.
In either section, to customize the email’s subject line, change the default value shown in the “Subject” field, as needed. To add a greeting, check the “Use Greetings” checkbox and then use the next two drop-downs to select a salutation and customer name format. To edit the body of the email, edit the default content in the “Message to customer” field.