How to Manage Expense Transactions in QuickBooks Online
How to Manage Expense Transactions in QuickBooks Online: Video
This video lesson, titled “How to Manage Expense Transactions in QuickBooks Online,” shows you how to manage all the transactions related to your expenses in QuickBooks Online. This video lesson is from our complete QuickBooks Online tutorial, titled “Mastering QuickBooks Online Made Easy.”
Overview:
How to View All Expense Transactions:
To view and manage all your expense transactions in QuickBooks Online, click the “Expense transactions” link under the “Expenses & Bills” app in the “All apps” bar. This page shows all expense transactions from the last 12 months, but you can change this by using the “Filter” drop-down button at the top of the page.
How to Open the Print Checks and Pay Bills Windows or Create New Transactions:
In the upper-right corner of the page are two drop-down buttons. To open the “Print Checks” or “Pay Bills” windows or to order checks from Intuit, click or select a choice from the “Print Checks / Pay bills / Order checks” drop-down button. Alternatively, to create a new expense transaction, click the “New Transaction” drop-down button. Then select the type of transaction to create from the drop-down menu that appears. Selecting any choice from this drop-down menu opens its transaction creation window.
How to Filter the Expense Transactions List by Transaction Type:
To filter the expenses by transaction type, click the drop-down at the left end of the filtering buttons above the list of expense transactions and select a choice. To filter the expenses by other criteria, click the “Filter” button in the “Expenses” page to show a menu of other filtering drop-downs. The filtering drop-downs in this menu include “Status,” “Delivery method,” “Date” with “From” and “To” fields, “Payee,” and “Category.” If needed, to apply a filter after selecting a drop-down filtering choice, click the “Apply” button in the menu. To reset the filtering choices, click the “Reset” button in the menu.
How to Remove Filters:
Applied filters appear in a list to the right of the “Filter” button. To remove an applied filtering choice, either click the “X” button to the right of the specific filter to remove or click the “Clear filter/ View all” link” to the right of the list of applied filters to clear all the filters.
How to Select Expense Transactions and Perform Batch Actions on Expenses:
To select an expense transaction in the “Expenses” page, click to check the checkbox to the left of the transaction. A “Batch actions” button or buttons then appear above the list of transactions, which lets you perform the same action on all selected transactions. Depending on which transactions are currently checked in the transactions list, the buttons change.
To perform a single action on multiple transactions of the same type, select the transactions on which to perform the batch action in the transactions list by checking the checkbox to the left of the transactions. Then click the desired “Batch actions” button to perform the action on those selected transactions.
How to Print or Export the Expense Transactions List:
In the upper-right corner of the transactions list are three buttons for “Export to Excel,” “Print,” and “Settings.” To download the expense transaction list as an Excel workbook, click the “Export to Excel” button. To open your web browser’s “Print” dialog box so you can print a printer-friendly version of the “Expenses” page, click the “Print” button.
How to Change the Display of the Expense Transactions List:
To show the display options for the expense transactions list in a drop-down menu, click the “Settings” button. To show or hide columns in the list, check or uncheck the names of the columns under the “Columns” heading in the drop-down menu. To select the number of transaction rows to show per page in the list, click the “Rows” drop-down in the drop-down menu and select a choice.
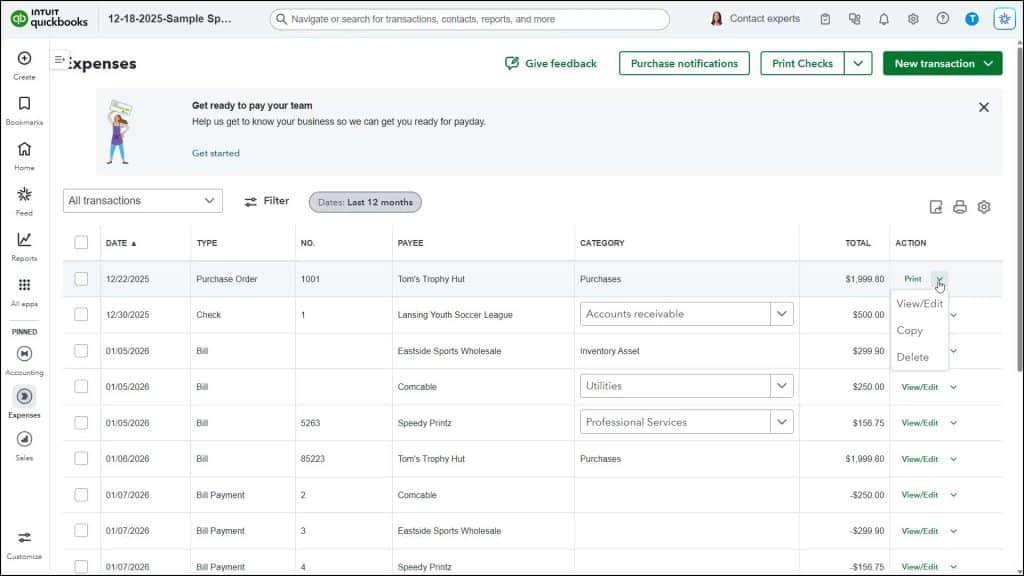
The default column headings for the expense transactions list are “Date,” “Type,” “No.,” “Payee,” “Category,” “Total,” and “Action.” Clicking any column headings other than “Action” sorts the transactions by the values in that column. Depending on the specific type of transaction, the “Category” column may contain a drop-down that lets you select to which account to attribute the expense. Clicking any transaction in the list opens the transaction’s window.
How to Perform Actions on Expense Transactions and View Multiple Pages of Expenses:
The “Action” column contains a link for an action you can click, and a drop-down from which you can select an action, which lets you perform the clicked or selected action on that particular transaction. The action choices vary, depending on the type of transaction.
When you display more transactions than you can show per page, based on the selected “Rows” value to show per page, you can then click the “First,” “Previous,” “Next,” and “Last” links in the lower-right corner of the list of transactions to move through the pages of transactions that appear.


