Adjust Row Height and Column Width in Word Tables – Instructions
Adjust Row Height and Column Width in Word Tables: Video
This video lesson, titled “Adjusting Cell Size,” shows the different methods you can use to adjust row height and column width in Word tables. This video is from our complete Word tutorial, titled “Mastering Word Made Easy v.2019 and 365.”
Adjust Row Height and Column Width in Word Tables: Overview
You can adjust row height and column width in Word tables using the mouse. To do this, place your mouse pointer over the border of the column or row to adjust. When you are in the correct place, the mouse pointer turns into a double-line with an intersecting arrow. At that point, you then click and drag to adjust the column width or row height.
Additionally, you can also use the commands in the “Cell Size” button group on the table’s “Layout” contextual tab in the Ribbon to adjust row height and column width in Word tables. To do this, first select the cells whose width or height you wish to adjust. Then use the “Height:” and “Width:” spinner boxes to set the height and the width of the selected cells.
You can also use the “AutoFit” button to apply automatic adjustments to selected cells. To do this, first select the cells to automatically adjust. Then click the “AutoFit” button in the “Cell Size” button group on the table’s “Layout” contextual tab in the Ribbon. Then select the method of adjustment to apply: “AutoFit Contents,” which resizes the cells to fit their content; “AutoFit Window,” which stretches the table across the page to fit the window; or “Fixed Column Width,” which lets you set the widths of the columns by hand using the techniques you just learned.
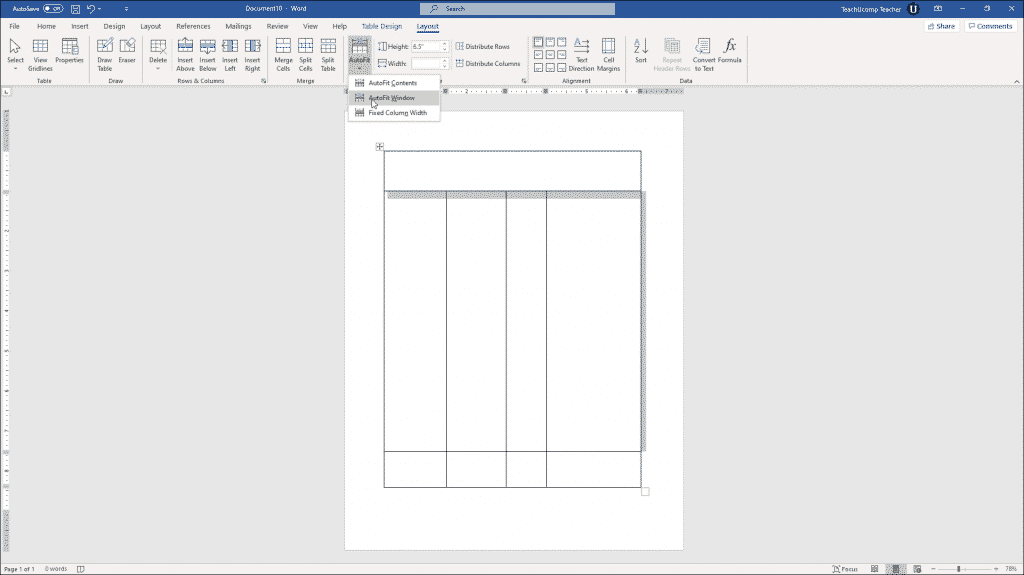
Adjust Row Height and Column Width in Word Tables- Instructions: A picture of a table in Word being adjusted by using the “AutoFit” button in the “Layout” tab of the “Table Tools” contextual tab in the Ribbon of Word.
Another way to adjust row height or column width in Word tables is to equally distribute the spacing allocated to a selection of rows or columns. For example, if you had three adjacent columns of unequal sizes in a table, you could select them and then resize them so each one was the same width over the selected area. To do this, select the columns or rows to evenly distribute. Then click either the “Distribute Rows” or “Distribute Columns” button in the “Cell Size” button group on the table’s “Layout” contextual tab in the Ribbon to distribute the selected columns or rows equally over the selected area.
Adjust Row Height and Column Width in Word Tables: Instructions
- To adjust row height and column width in Word tables by using the mouse, place the mouse pointer over the border of the column or row to adjust until the mouse pointer turns into a double line with an intersecting arrow.
- Then click and drag to adjust the column width or row height.
- To adjust cell sizes by using the buttons within the table’s “Layout” contextual tab in the Ribbon, select the cells whose height and width you want to adjust.
- Then click table’s “Layout” contextual tab in the Ribbon to display the “Cell Size” button group.
- Use the “Height:” and “Width:” spinner boxes in the “Cell Size” button group to set the height and width of the selected cells.
- To apply automatic adjustments to selected cells, select the table cells to adjust.
- Then click the “AutoFit” button in the “Cell Size” button group on the table’s “Layout” contextual tab in the Ribbon.
- Then select an option button for either “AutoFit Contents,” which resizes the cells to fit their content; “AutoFit Window,” which stretches the table across the page to fit the window; or “Fixed Column Width,” which lets you set the widths of the columns by hand, as shown in step #1.
- To equally distribute the spacing allocated to a selection of rows or columns, select the rows or columns to equally distribute in your table.
- Then click the table’s “Layout” contextual tab in the Ribbon.
- Then click either the “Distribute Rows” or “Distribute Columns” button in the “Cell Size” button group, as desired.
- Your selected rows or columns are then evenly distributed over the selected area.

