TeachUcomp, Inc.

 MY CART
  • VIDEO COURSES
    • All-Access Subscriptions
    • Business Licensing
    • Course List
      • Accounting
      • Adobe
        • Acrobat
        • Lightroom Classic
        • Photoshop
        • Photoshop Elements
      • Crystal Reports
      • Employment Skills
        • Interview Skills
        • Resume Skills
      • For Lawyers
        • Excel for Lawyers
        • Outlook for Lawyers
        • QuickBooks for Lawyers
        • Word for Lawyers
      • HTML
      • JavaScript
      • Microsoft Office
        • Access
        • Excel
        • Microsoft Office Suite
        • OneNote
        • Outlook
        • Outlook on the Web
        • PowerPoint
        • Publisher
        • Word
      • Microsoft Project
      • Microsoft Teams
      • QuickBooks Online
      • QuickBooks Pro
      • Sage
        • Peachtree
        • Sage 50
      • SQL
      • Windows
    • Video Course Options
  • SUBSCRIPTIONS
  • MANUALS
    • Adobe
      • Acrobat
      • Lightroom Classic
      • Photoshop
      • Photoshop Elements
    • Crystal Reports
    • For Lawyers
      • Excel for Lawyers
      • Outlook for Lawyers
      • QuickBooks for Lawyers
      • Word for Lawyers
    • HTML
    • JavaScript
    • Microsoft Office
      • Access
      • Excel
      • OneNote
      • Outlook
      • Outlook on the Web
      • PowerPoint
      • Publisher
      • Word
    • Microsoft Project
    • Microsoft Teams
    • QuickBooks Online
    • QuickBooks Pro
    • Sage
      • Peachtree
      • Sage 50
    • SQL
    • Windows
  • REFERENCE CARDS
    • Adobe
      • Acrobat
      • Lightroom Classic
      • Photoshop
      • Photoshop Elements 2023
      • Photoshop Elements 2022
      • Photoshop Elements 2021
      • Photoshop Elements 2020
      • Photoshop Elements 2019
      • Photoshop Elements 2018
      • Photoshop Elements 15
    • Google
      • Google Classroom for Teachers
      • Google Docs
      • Google Drive
      • Google Forms
      • Google Sheets
      • Google Slides
    • Mac OS
      • Mac OS Ventura-Mojave Keyboard Shortcuts
    • Microsoft Office
      • Excel Keyboard Shortcuts
      • Microsoft Office 365
        • Access for Office 365
        • Excel for Office 365
        • Microsoft Office 365
        • Outlook for Office 365
        • PowerPoint for Office 365
        • Publisher for Office 365
        • Word for Office 365
      • Microsoft Office 2021
        • Access 2021
        • Excel 2021
        • Microsoft Office 2021
        • Outlook 2021
        • PowerPoint 2021
        • Publisher 2021
        • Word 2021
      • Microsoft Office 2019
        • Access 2019
        • Excel 2019
        • Microsoft Office 2019
        • Outlook 2019
        • PowerPoint 2019
        • Publisher 2019
        • Word 2019
      • Microsoft Office 2016
        • Access 2016
        • Excel 2016
        • Microsoft Office 2016
        • OneNote 2016
        • Outlook 2016
        • PowerPoint 2016
        • Publisher 2016
        • Word 2016
      • Microsoft Office 2013
        • Excel 2013
        • Microsoft Office 2013
        • OneNote 2013
        • Outlook 2013
        • PowerPoint 2013
        • Word 2013
      • Microsoft Office for iPad
        • Microsoft Office for iPad
    • Microsoft Teams
      • Microsoft Teams
    • QuickBooks Online
      • QuickBooks Online
    • QuickBooks Pro
      • QuickBooks Pro 2023
      • QuickBooks Pro 2022
      • QuickBooks Pro 2021
      • QuickBooks Pro 2020
      • QuickBooks Pro 2019
      • QuickBooks Pro 2018
      • QuickBooks Pro 2017
      • QuickBooks Pro 2016
      • QuickBooks Pro 2015
      • QuickBooks Pro 2014
    • Sage
      • Sage 50 2019
      • Sage 50 2018
    • SQL
      • SQL
    • Windows
      • Windows 11
      • Windows 11 and 10 Keyboard Shortcuts
      • Windows 10
  • STICKERS
    • Chrome OS
      • Chrome OS for Chromebooks
    • Mac OS
      • Mac OS Ventura
      • Mac OS Monterey-Mojave
    • Microsoft Office
      • Word and Excel (Mac) 2022
      • Word and Excel (PC/Windows) 2021-2016 and 365
    • QuickBooks Desktop
      • QuickBooks Desktop (PC/Windows) 2023
      • QuickBooks Desktop (PC/Windows) 2022-2015
    • Windows
      • Windows 11 and 10
  • SUPPORT
    • Company
      • About Us
      • Blog
      • Contact Us
      • Our History
      • Our Philosophy
        • Customer Service
        • Mission
      • Policies
      • Testimonials
    • Contact Us
    • FAQ
    • Help
    • Lost Password
    • Register a Product
  • LOGIN
    • Manage My Account
    • Member Login
    • My Courses
Shop Now

How to Create a Table of Contents in Word 2013

by Keeley Byrnes / Wednesday, May 22 2013 / Published in Latest, Word 2013

Adding a table of contents to a long document such as a report or a formal paper is a nice touch to help readers find information. In this post we will show the step by step process it takes to create a table of contents in Microsoft Word 2013.


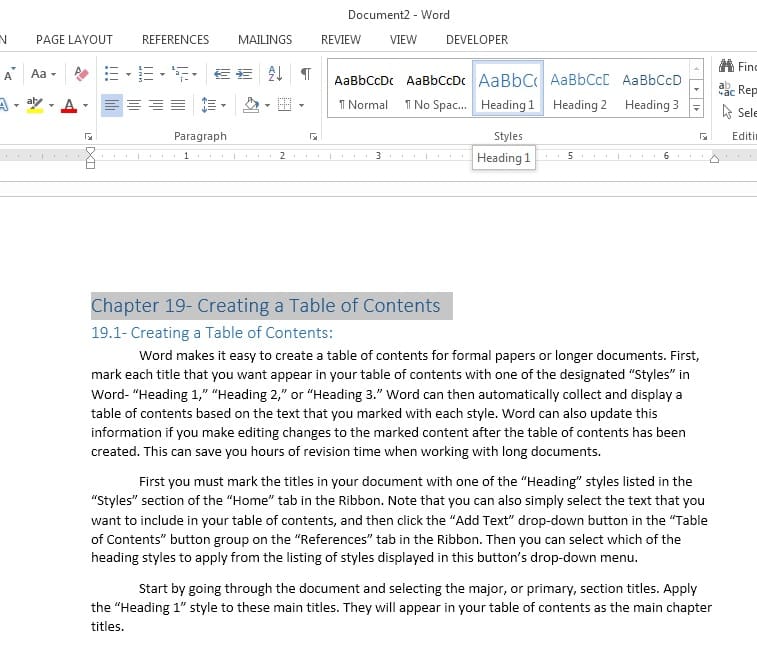
1. Mark the titles in your document by highlighting them and then clicking to apply one of the “Heading” styles listed in the “Styles” section of the “Home” tab in the Ribbon. Apply the “Heading 1” style to these main titles. They will appear in your table of contents as the main chapter titles.

1

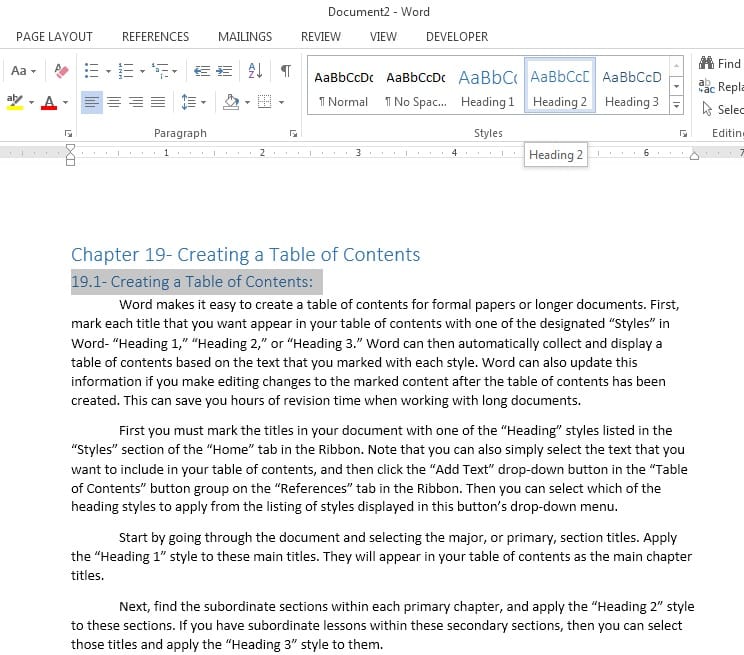
2. Find the subordinate sections and apply the “Heading 2” style to these sections. If you have subordinate lessons within these sections, then you can select those titles and apply the “Heading 3” style to them.

2


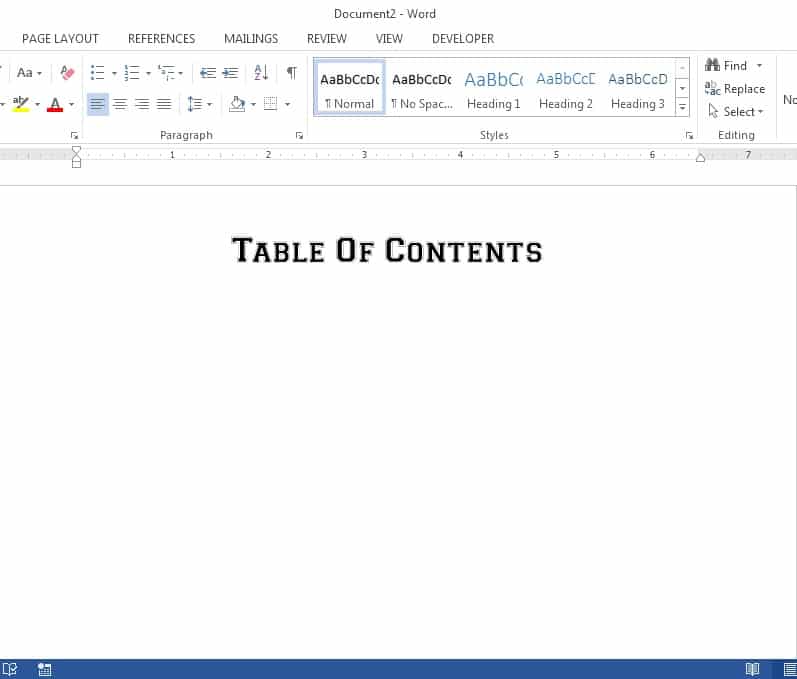
3. Click into your document to place the insertion marker at the place in the document where you want the table of contents to appear.

3


4. Click the “Table of Contents” button in the “Table of Contents” button group on the “References” tab in the Ribbon.

4


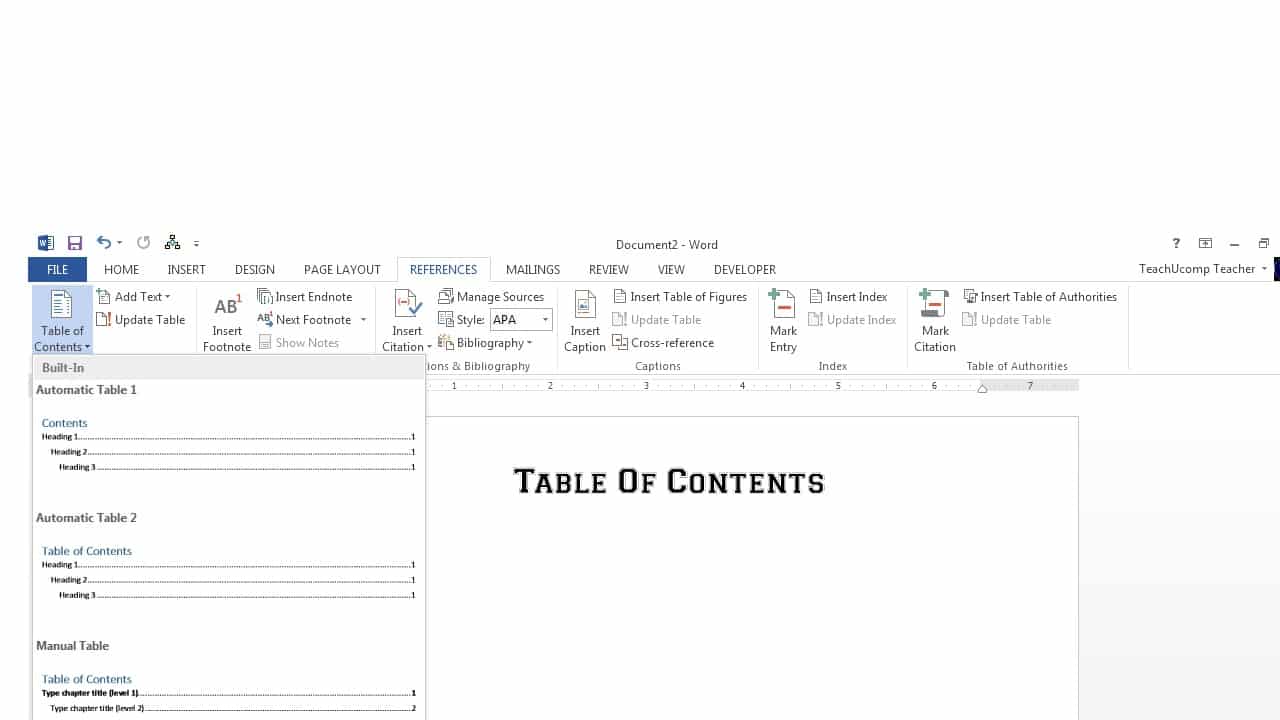
5. Select one of the “Automatic” table of content styles listed or create a custom table of contents.

6. To create a custom table of contents, select the “Custom Table of Contents…” command from the button’s drop-down menu to open the “Table of Contents” dialog box and display the “Table of Contents” tab where you can customize the style and appearance of the table of contents.


5


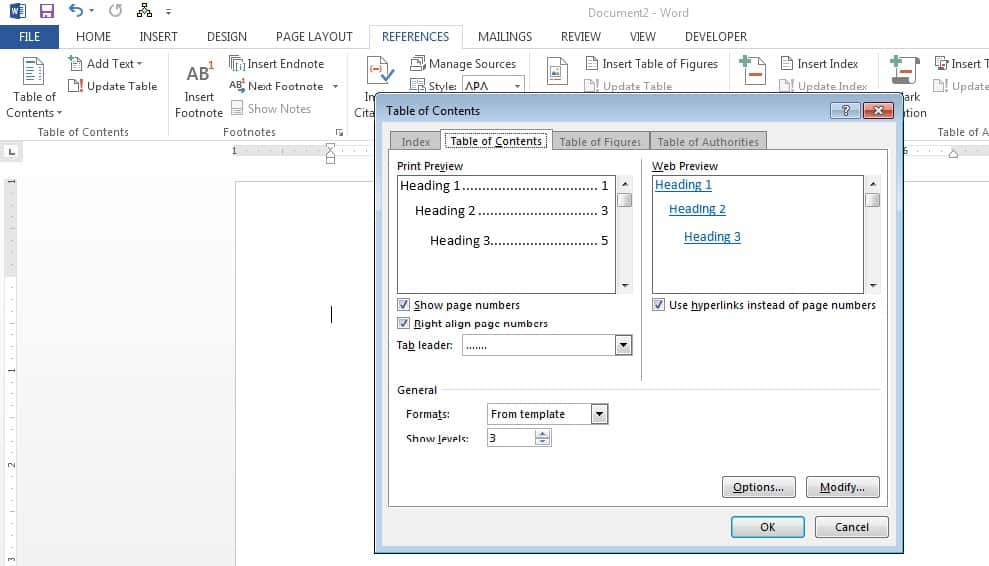
7. Use the “Print Preview” section to see how your table of contents will print. There are also options for changing the appearance of the printed version of your table of contents. You can also select the desired style of leader tab to connect the chapter titles to the page numbers from the “Tab leader:” drop-down.

8. In the “General” section, you can alter the general settings of the table of contents. Use the “Formats:” drop-down to select a general format for the table of contents. Use the “Show levels:” spinner box to enter the number of subordinated levels to display within your table of contents. *Note, however, that in addition to changing the levels to display in the table of the contents here, you will also need to format those titles within your document using the additional subordinate heading styles, such as “Heading 4,” Heading 5,” and so on, before they will appear in your table of contents.

9. Once you have set all of the options for your table of contents, simply click the “OK” button to insert your table of contents.


6

Note that the table of contents is simply a field. Like all fields, you can toggle the display of the field code between the actual table’s contents and the field’s contents by clicking into the table of contents and then pressing “Shift” + “F9” on your keyboard to toggle the view.


Tagged under: 2000, 2002, 2003, 2007, 2010, 2013, 97, basic, book, cd, class, classes, course, courses, dvd, help, how, how-to, instruction, instructional, learn, manual, micro, microsoft, ms, office, online, soft, software, training, tutorial, video, word, word processing, xp

About Keeley Byrnes

Keeley is our Director of Marketing and has been with TeachUcomp since 2010. Keeley manages all aspects of our Marketing Department, acts as liaison for our reseller and affiliate partners and also authors courses in software and taxation.

What you can read next

Running a Slide Show in Microsoft PowerPoint 2010
Rotate Pages in Acrobat- Instructions: A picture showing show to rotate pages in Acrobat Pro DC by using the “Organize Pages” view.
Rotate Pages in Acrobat- Instructions and Video
File Explorer in Windows 10 - Instructions: A picture of the File Explorer window within Windows 10.
File Explorer in Windows 10 – Instructions


Recent Posts

  • A picture of a user applying the Paint Bucket Tool in Photoshop Elements.

    The Paint Bucket Tool in Photoshop Elements- Instructions

    Overview of How to Use the Paint Bucket Tool in...
  • A picture of highlights applied by the Recompose Tool in Photoshop Elements, showing areas to remove and protect in a photo.

    The Recompose Tool in Photoshop Elements – Instructions

    Overview of How to Use the Recompose Tool in Ph...
  • A picture showing how to import files to the Organizer in Photoshop Elements by using the “Get Photos and Videos from Files and Folders” dialog box.

    Import Files to the Organizer in Photoshop Elements – Instructions

    Overview of How to Import Files to the Organize...

Categories

Archives

  • GET SOCIAL

© 2001-2023 Copyright TeachUcomp, Inc. All rights reserved.

TOP
Go to mobile version
Sale! $49 All-Access 0 Days 21 Hours 16 Minutes 17 Seconds      $199 $49 Entire Library!
See Deal