A contact is someone important to your business or personal life that you want to keep in contact with using Outlook. The “Contacts” folder in Outlook is basically the same as an electronic Rolodex, or address book. You use it to keep information about your business and personal contacts. It helps store and organize information about people that are important to you. Once you have entered the information details of a contact, such as their address, company, phone number, and e-mail address, Outlook will then be able to assist you in sending these people e-mail, making phone calls, and generating letters to the contact.
In this post, we will discuss how to create new contacts in Outlook 2013.
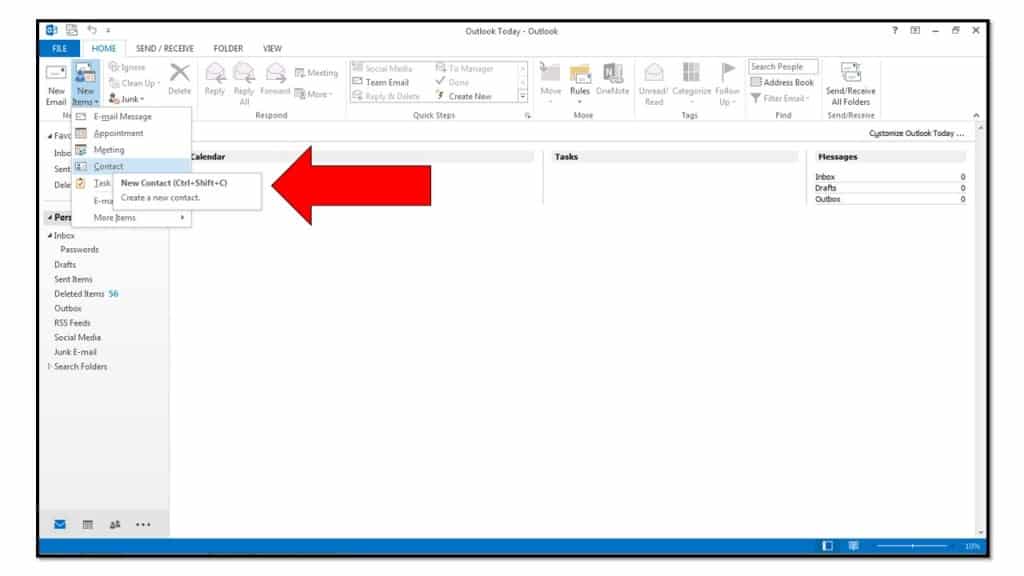
1. Click the “New Contact” button in the “New” group on the “Home” tab in the Ribbon in Outlook 2013.
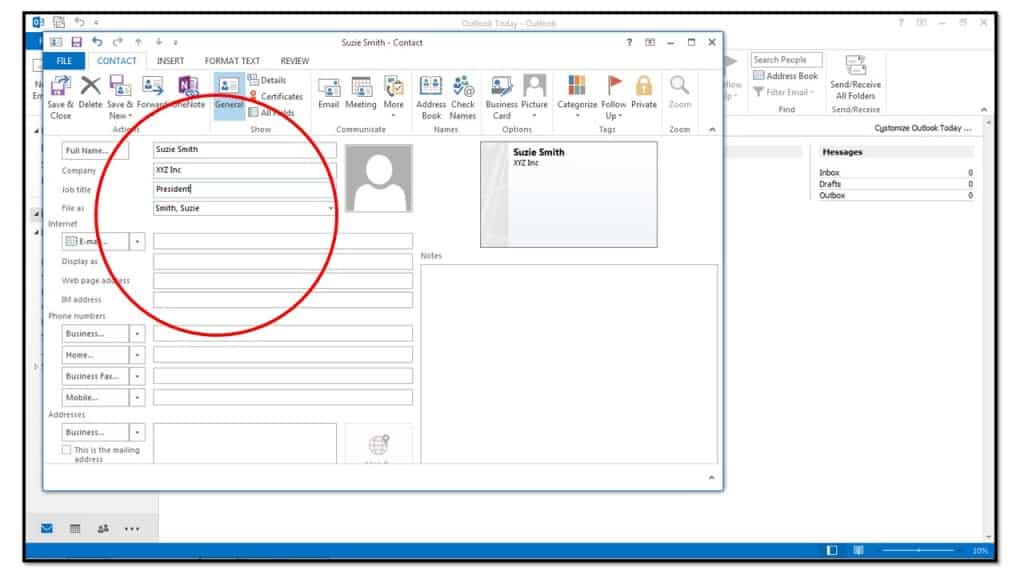
2. Within the “Contact” window that appears, enter all of the contact’s information that you wish to record into the available fields.
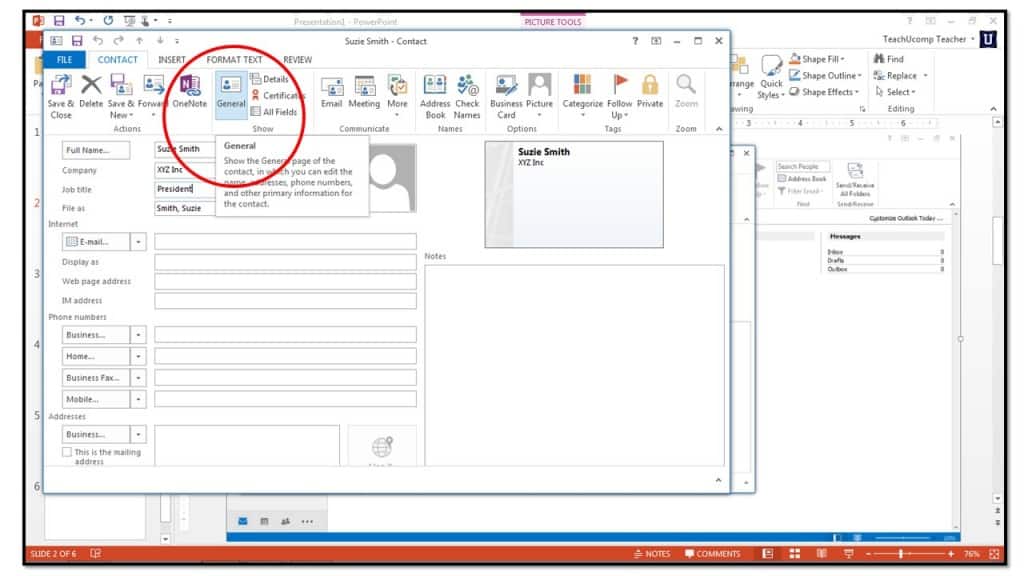
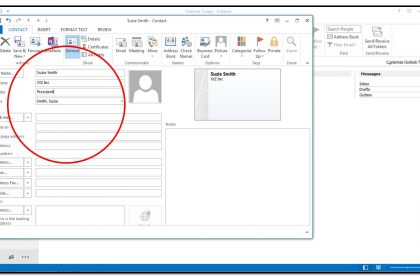
3. Click the “General” button in the “Show” group on the “Contact” tab in the Ribbon to display fields for the basic contact information, like a contact’s name and address.
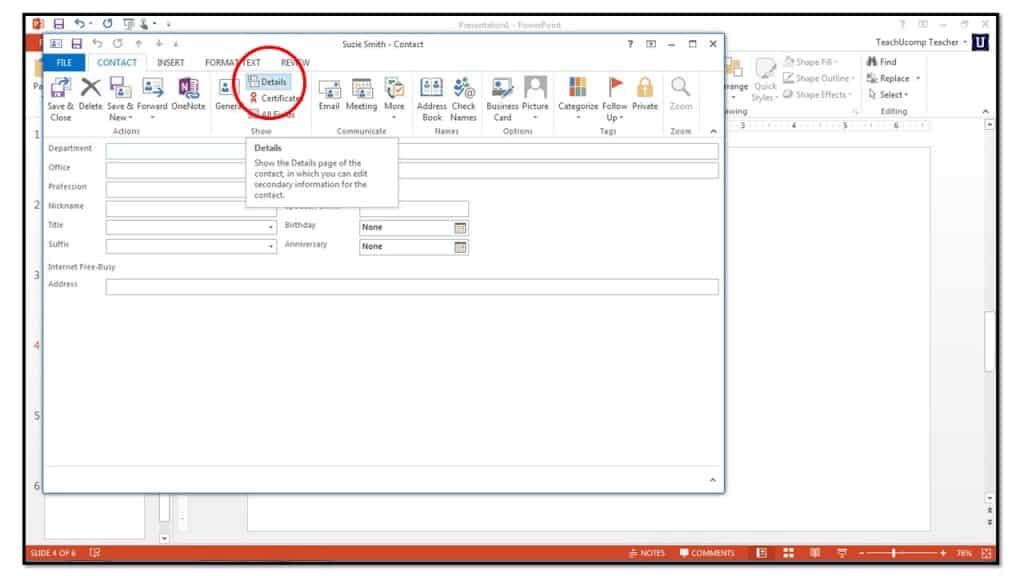
4. Click the “Details” button in the “Show” group to display fields that allow you to enter detailed information, like a contact’s department and assistant’s name.
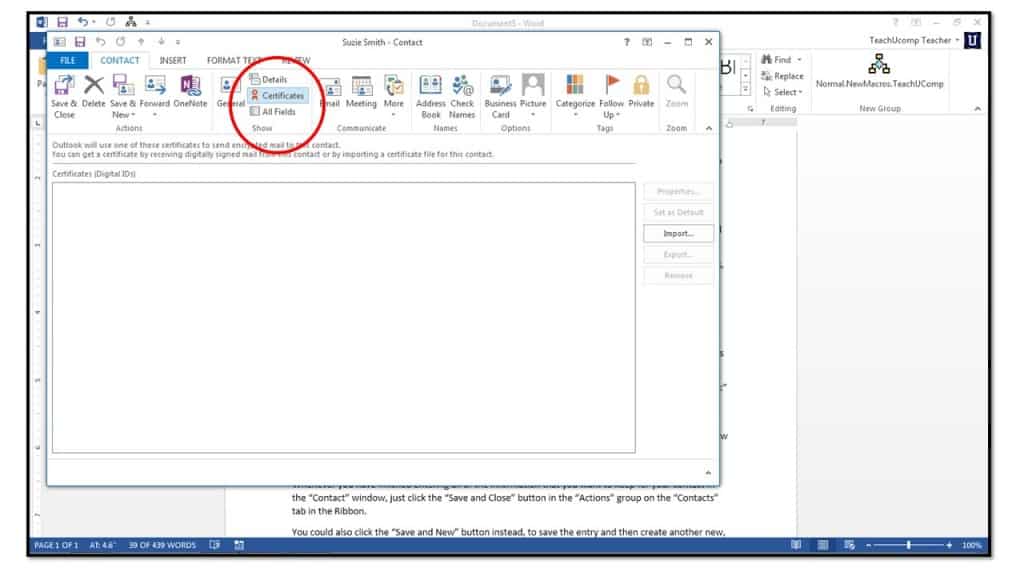
5. Click the “Certificates” button to list certificates that you can use to send encrypted mail to this contact.
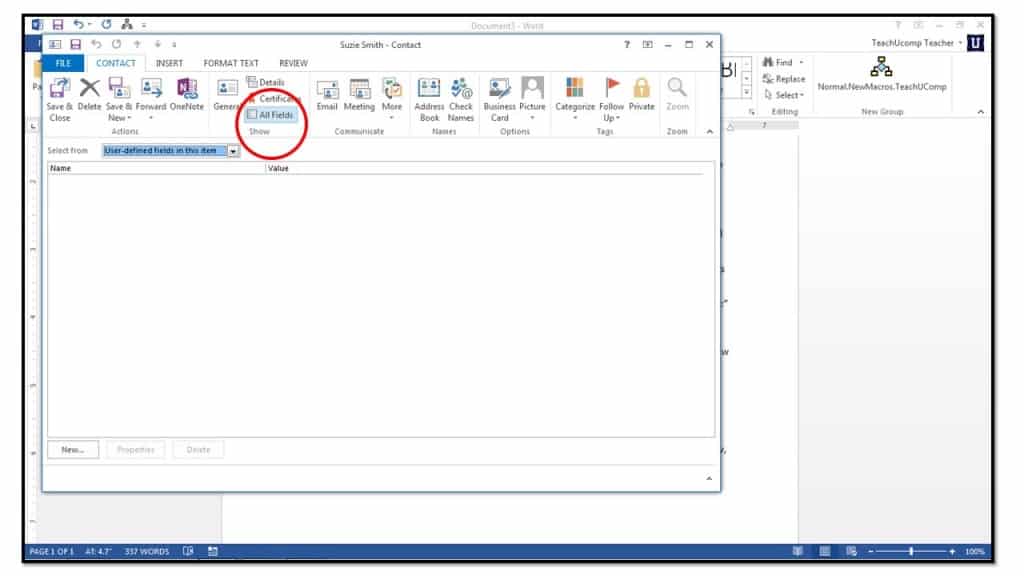
6. Click the “All Fields” button to select a type of field information to enter from the “Select from:” drop-down. All of the fields categorized under that field type will be displayed. You can then enter or edit the information in the fields using this tab.
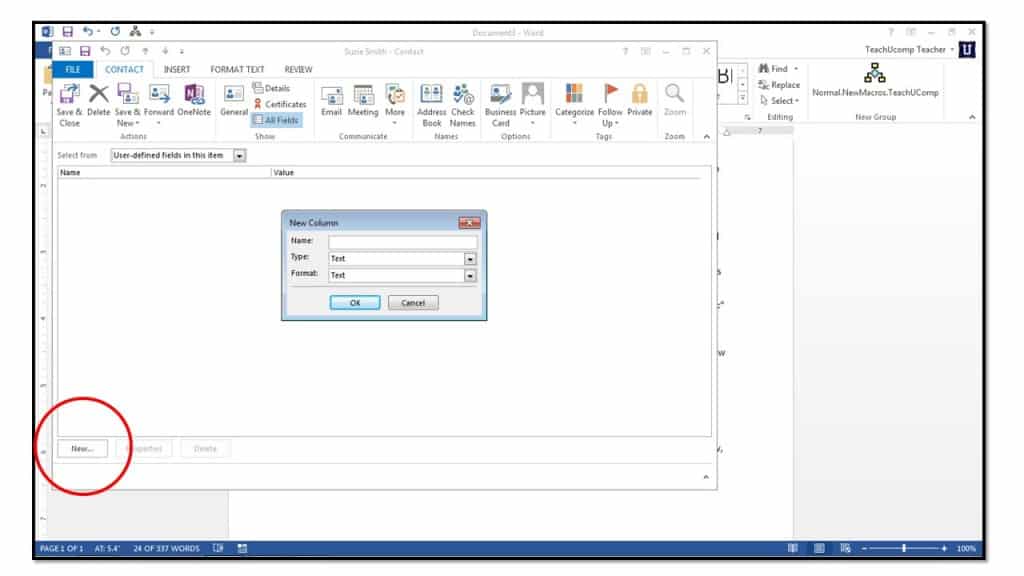
7. Also note that you can also click the “New…” button at the bottom of the “All Fields” view to create new types of data fields to store whatever information you want about the contact. You can then store this custom field information just like you store their name and email address.
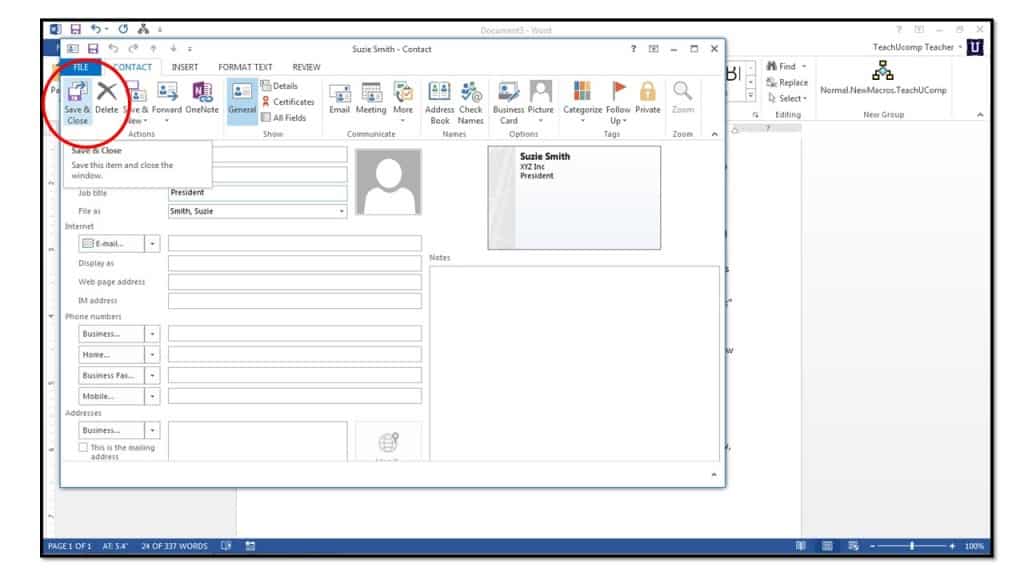
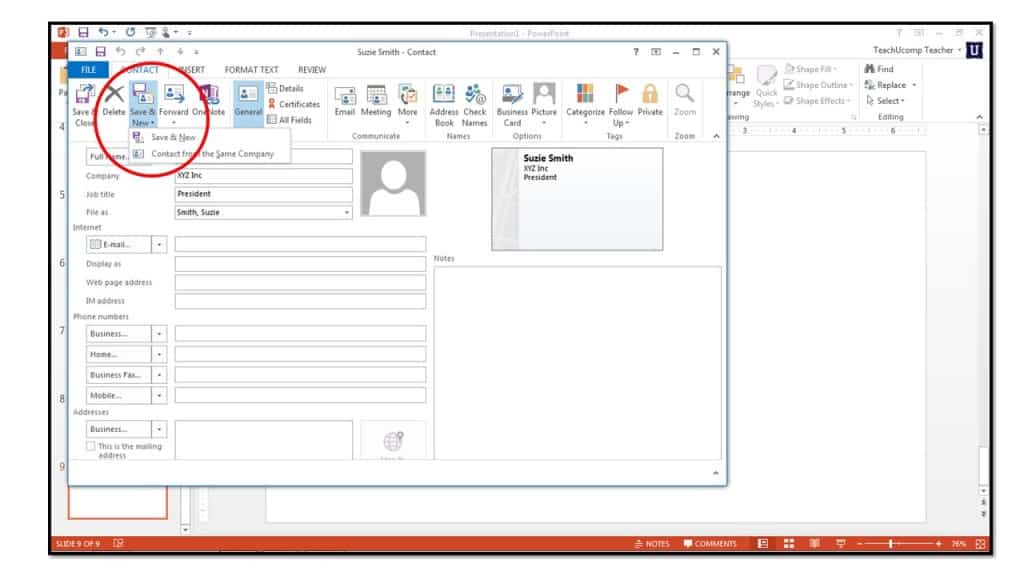
8. Whenever you have finished entering all of the information that you want to keep for your contact in the “Contact” window, just click the “Save and Close” button in the “Actions” group on the “Contacts” tab in the Ribbon.
9. You could also click the “Save and New” button instead, to save the entry and then create another new, blank contact. This is useful when you are creating multiple contacts in a single session.

