Categorize an Item in Outlook on the Web – Instructions
Categorize an Item in Outlook on the Web: Video Lesson
This video lesson, titled “Categorizing Items,” shows you how to categorize an item in Outlook on the Web. This video lesson is from our Outlook on the Web tutorial, titled “Mastering Outlook on the Web Made Easy v.2016.”
Categorize an Item in Outlook on the Web: Overview
To categorize an item in Outlook on the Web within the Mail, Calendar, or Tasks folders, right-click the item. Then hover over the “Categorize” command in the pop-up menu that appears. Then select a category to which to assign the item from the side menu of choices that appears. The category is visually represented by a small bar the color of the category you selected.
To clear the categories to which an item is assigned, right-click the item. Then hover over the “Categorize” command. Then click the “Clear categories” command in the side menu that appears.
When creating new Calendar or Task items, you can set the category while creating it. To do this, click the “More” dots in the menu list at the top of the item creation pane, select “Categorize,” and then choose a category.
You can also add a “Charm,” or small graphic image, to your Calendar events or Tasks. This helps further categorize the item. To add a charm to your calendar item, click the “Charm” drop-down at the top of the item creation window. Then choose a charm from the drop-down menu of choices.
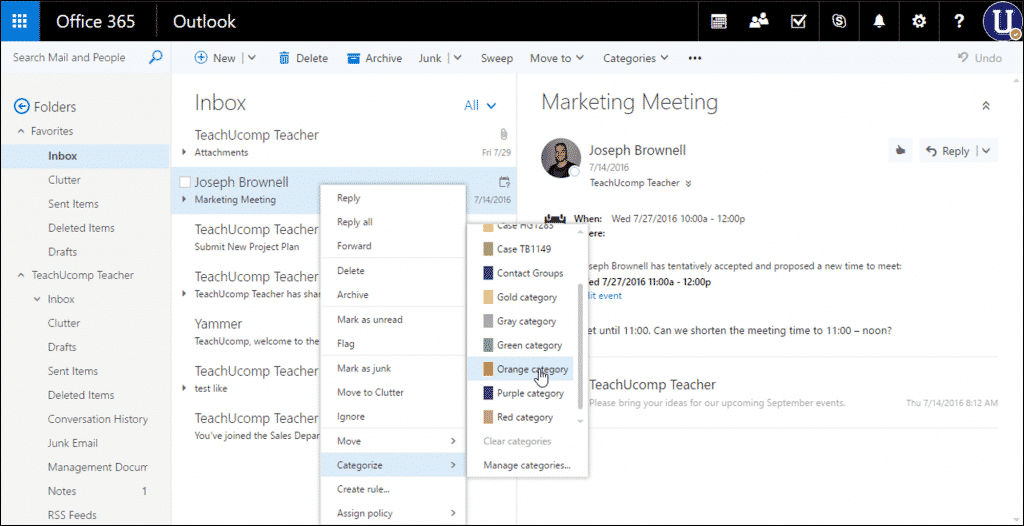
Categorize an Item in Outlook on the Web – Instructions: A picture of a user categorizing a Mail item in Outlook on the Web.
Categorize an Item in Outlook on the Web: Instructions
- To categorize an item in Outlook on the Web in the Mail, Calendar or Task folders, right-click the item.
- Then hover over the “Categorize” command in the pop-up menu that appears.
- Then select a category to which to assign the item from the side menu of choices that appears.
- To clear a category from an item, right-click the item.
- Then hover over the “Categorize” command.
- Then click the “Clear categories” command in the side menu that appears.
- To assign a category to a Calendar or Task item when creating it, click the “More” dots in the menu list at the top of the item creation pane, select “Categorize,” and then choose a category.
- To add a charm to your calendar item, click the “Charm” drop-down at the top of the item creation window.
- Then choose a charm from the drop-down menu of choices.
